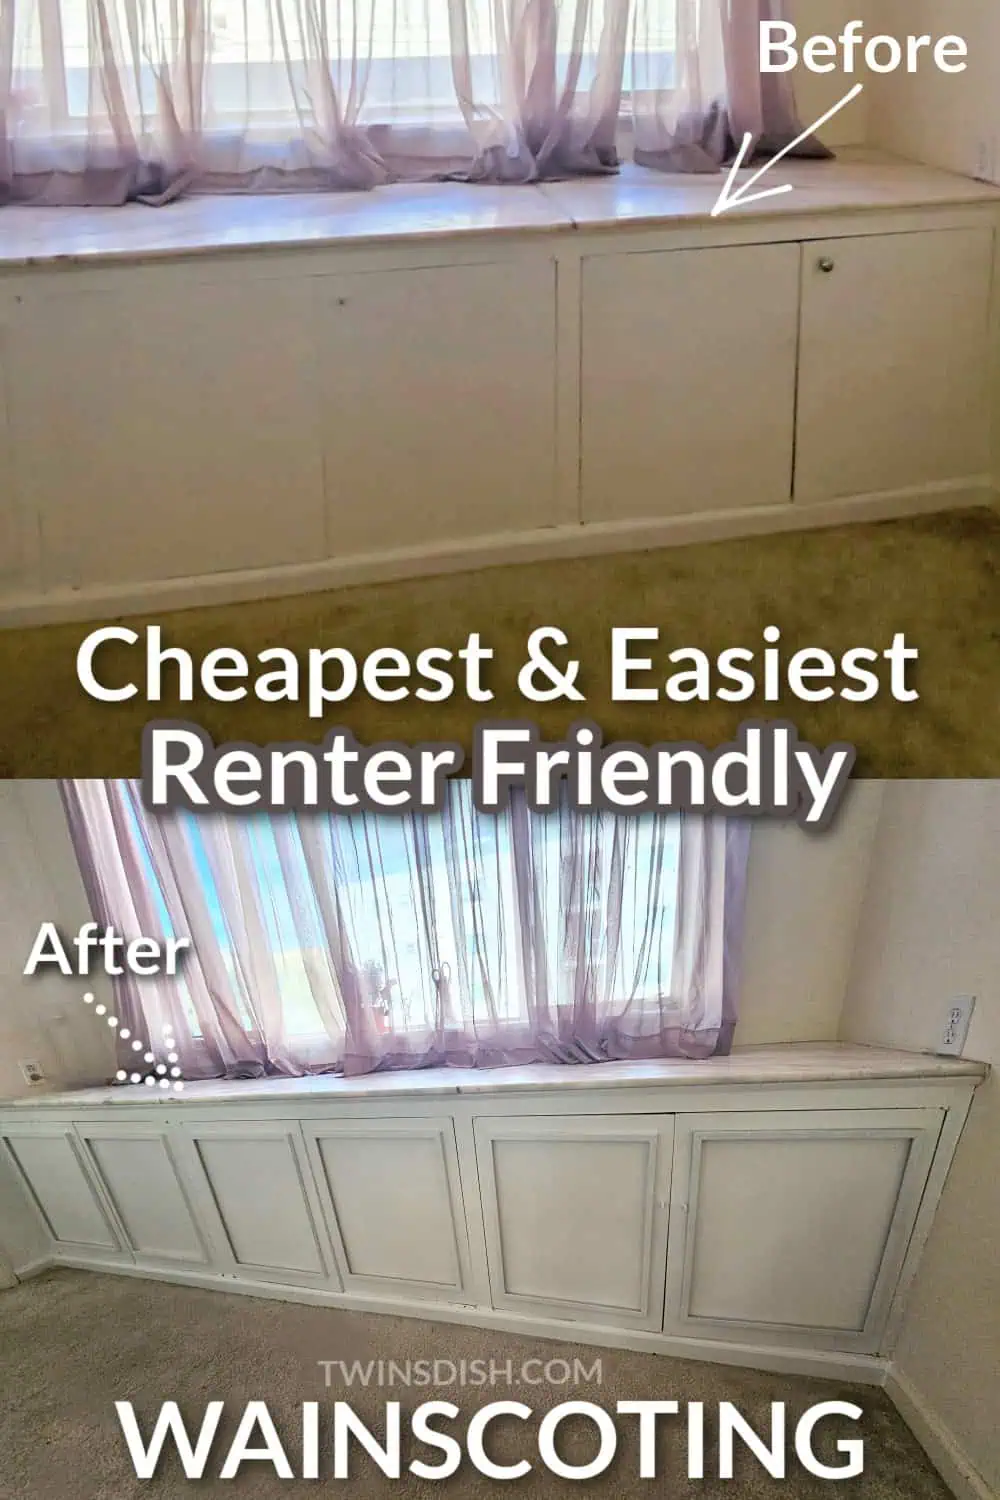
Easy Renter Friendly Diy Wainscotting How To
We’ve seen A LOT of so called “easy hacks” for Diy renter friendly wainscoting that are either super expensive, take hours to do, or pull chunks of plaster off your walls when you try to remove them.
With our method, any renter or building owner can enjoy the beautiful elegance wainscoting brings to any room or cabinet using just 2 supplies from Amazon!
If you’re tired of looking at bare walls and want to add warmth or elegance to your home or apartment without the commitment, keep reading for our easy tutorial!
Remember to pin this for later or reference!
What You’ll Need:
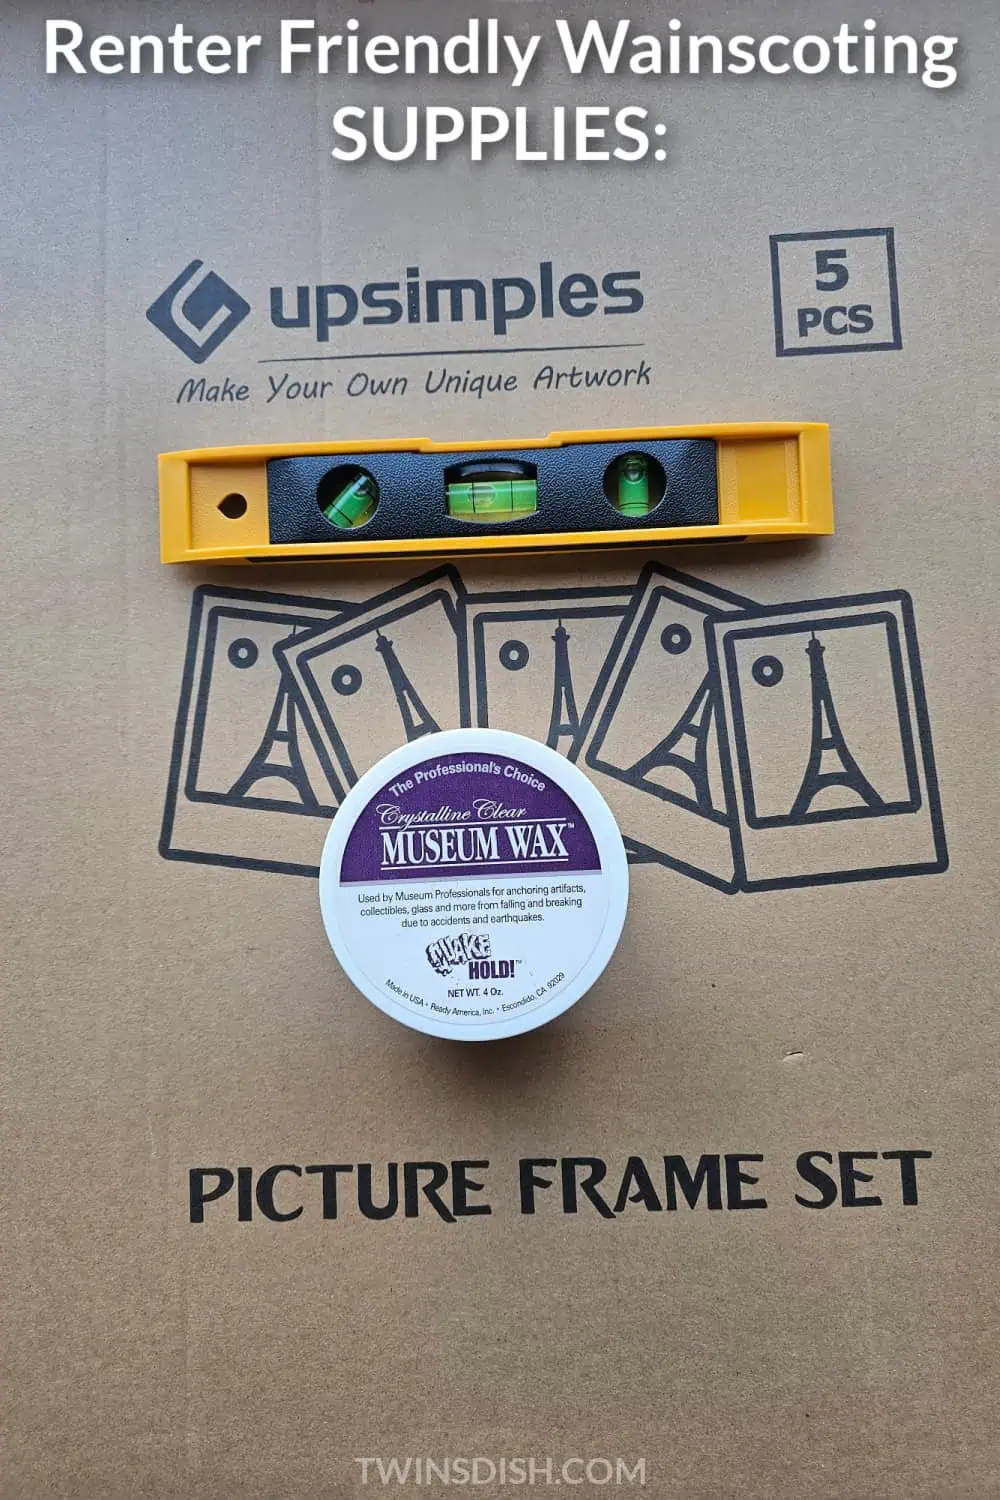
1. Picture frames in size of choice. We used these 5 pack picture frames from Amazon they come in multiple colors and sizes and are super light weight.
2. Earthquake Putty but you can also use Fun Tak. Earthquake putty is cheaper but leaves a residue (we’ll show you how to remove it).
Fun tak is more expensive since you have to buy multiple packs but residue free.
3. A Level tool to make sure the wainscoting is straight and level. We found one at Dollar Tree.
Optional:
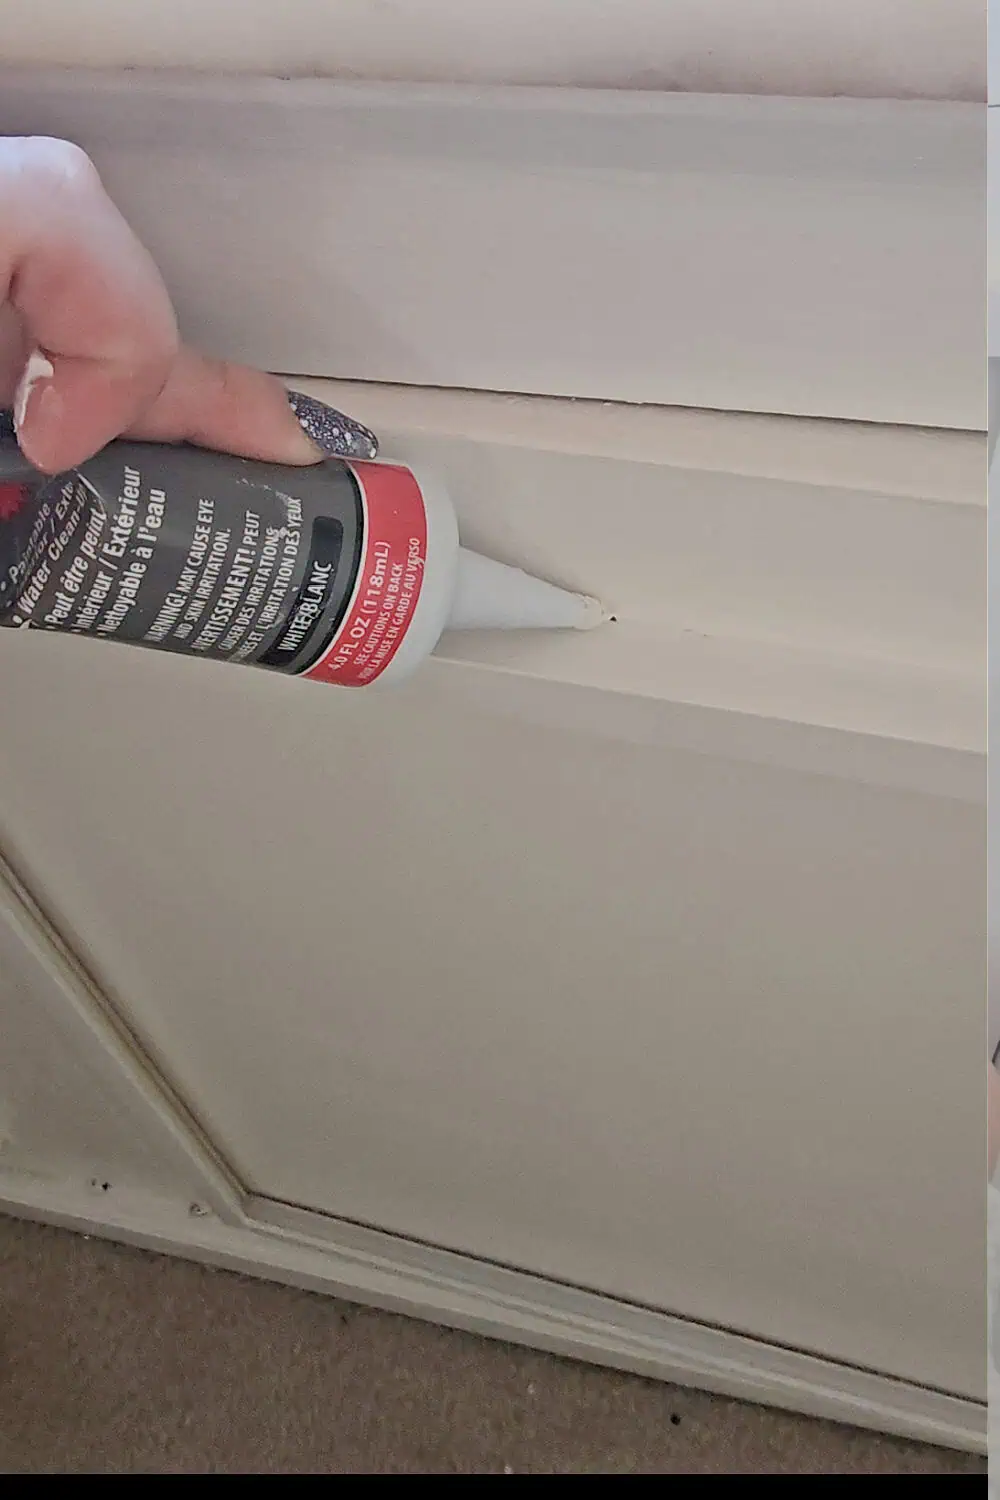
4. Caulk (from Dollar Tree)
5. Paint
Easy Diy Renter Friendly Wainscoting How To:
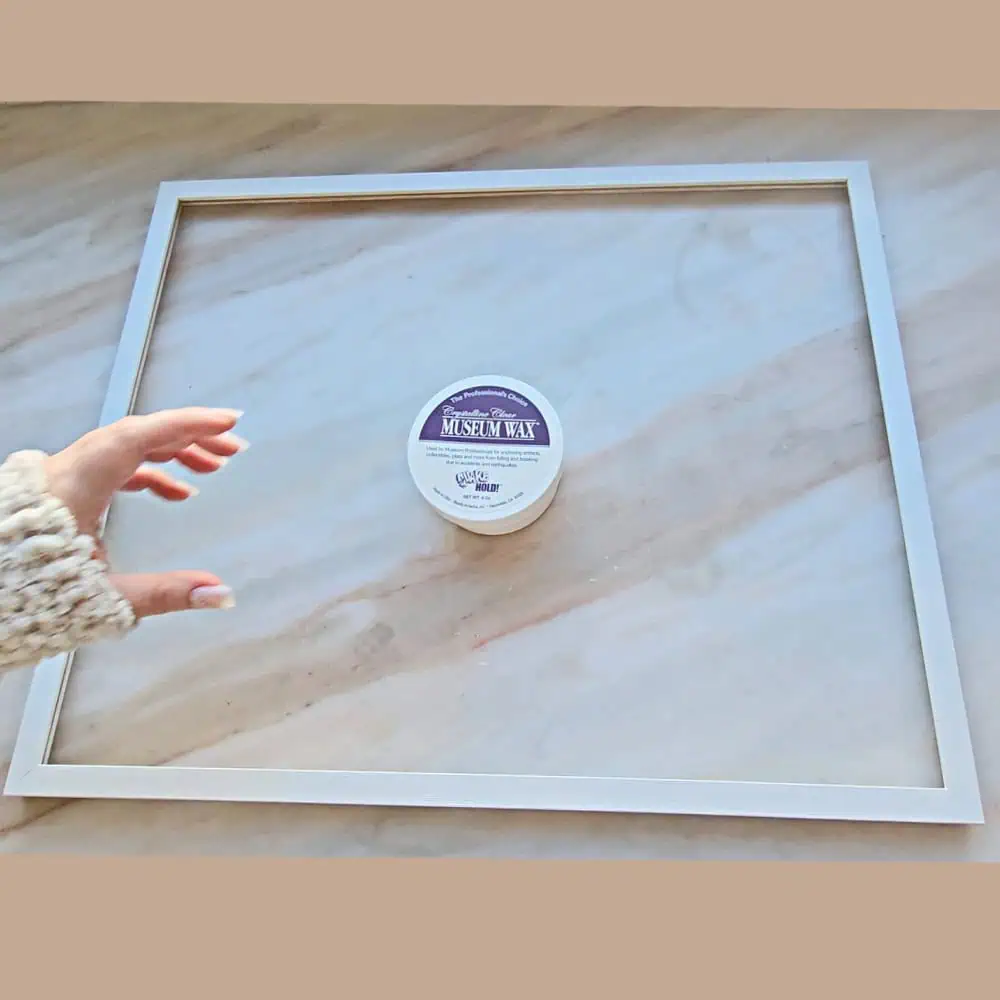
Step 1: Remove the backing of the picture frames leaving only the frame and nothing else.
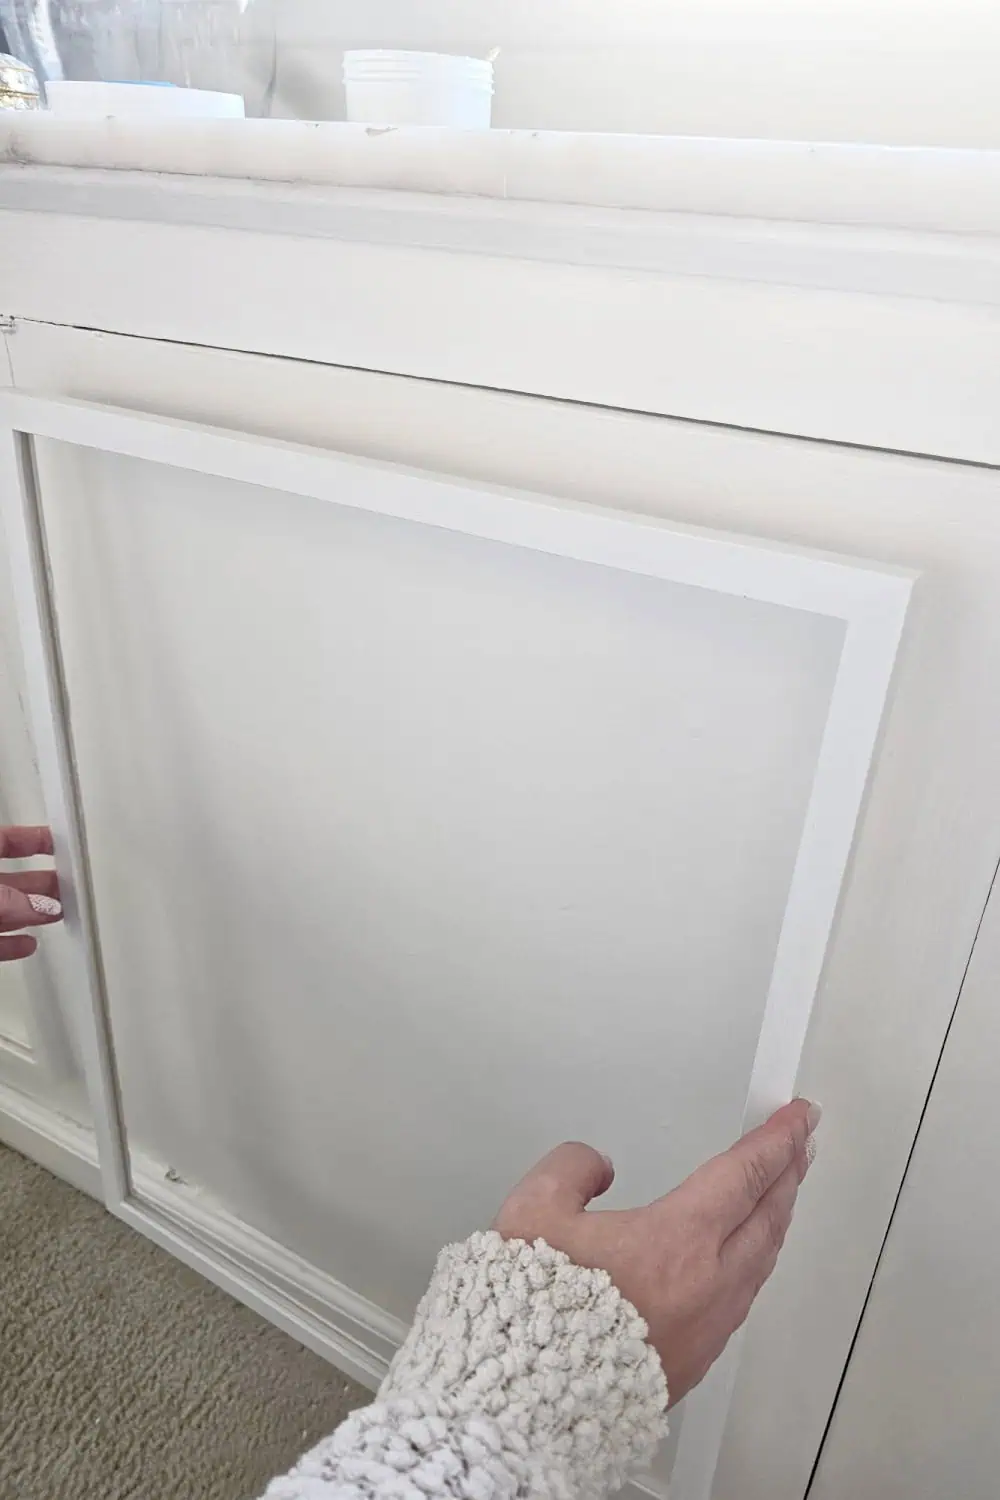
Step 2: Decide where on the wall you want the frames to go and use the Level tool to draw a straight line with a pencil so you know where to hang the frames.
Step 3: Open up the Earthquake putty and with the included wooden spatula scoop out a small amount of putty. (If you bought Fun tak, follow the instructions on packaging)
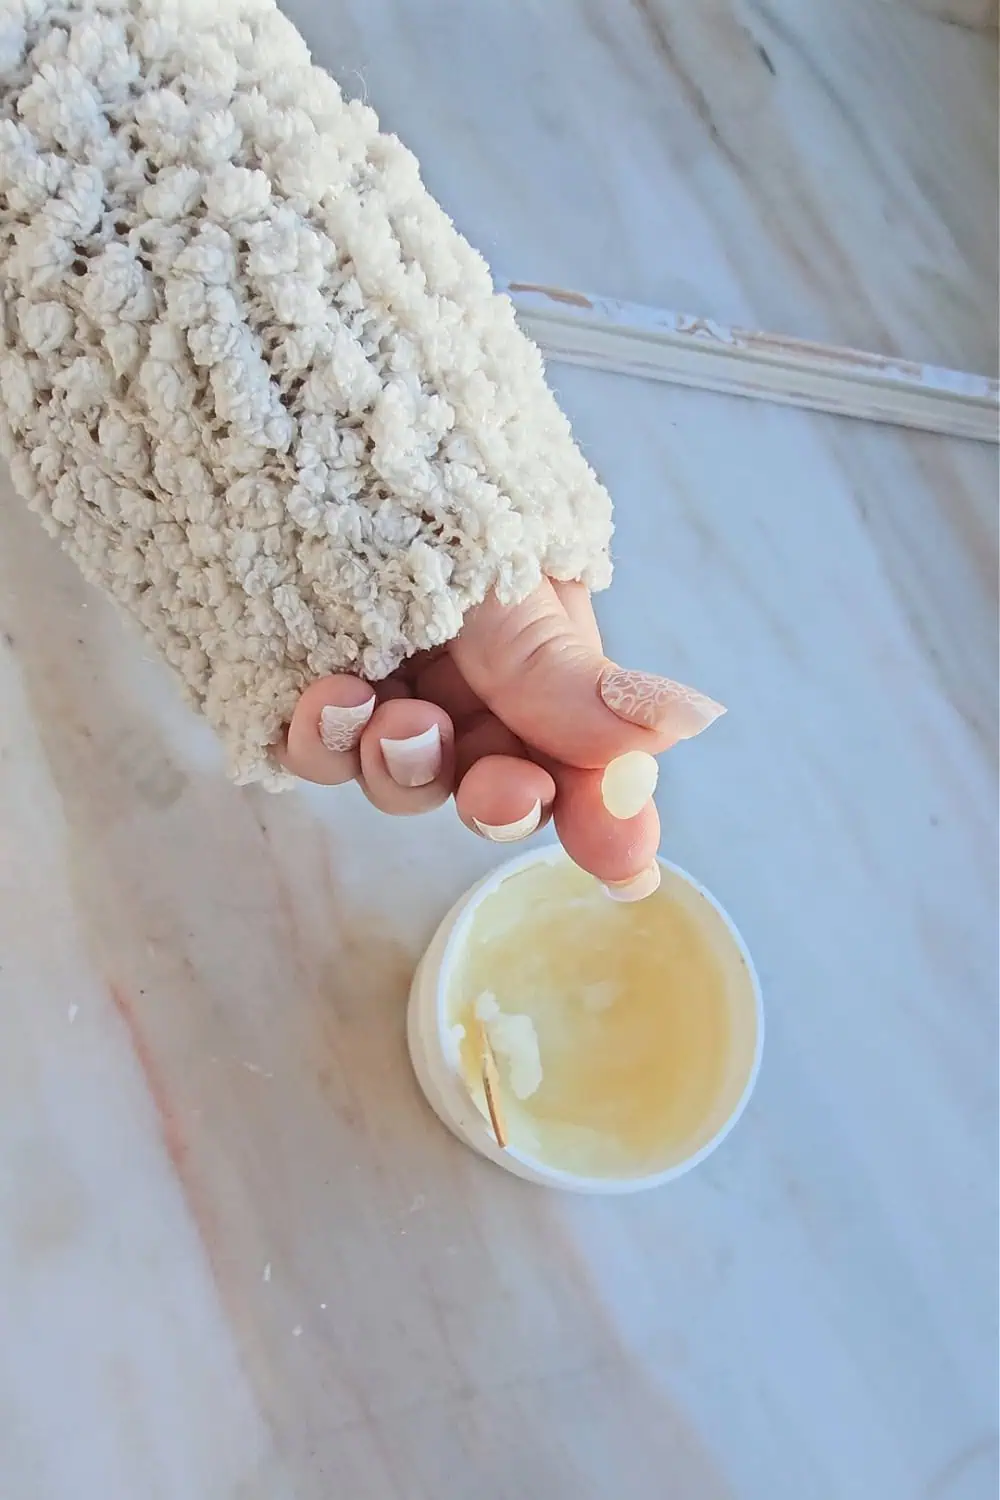
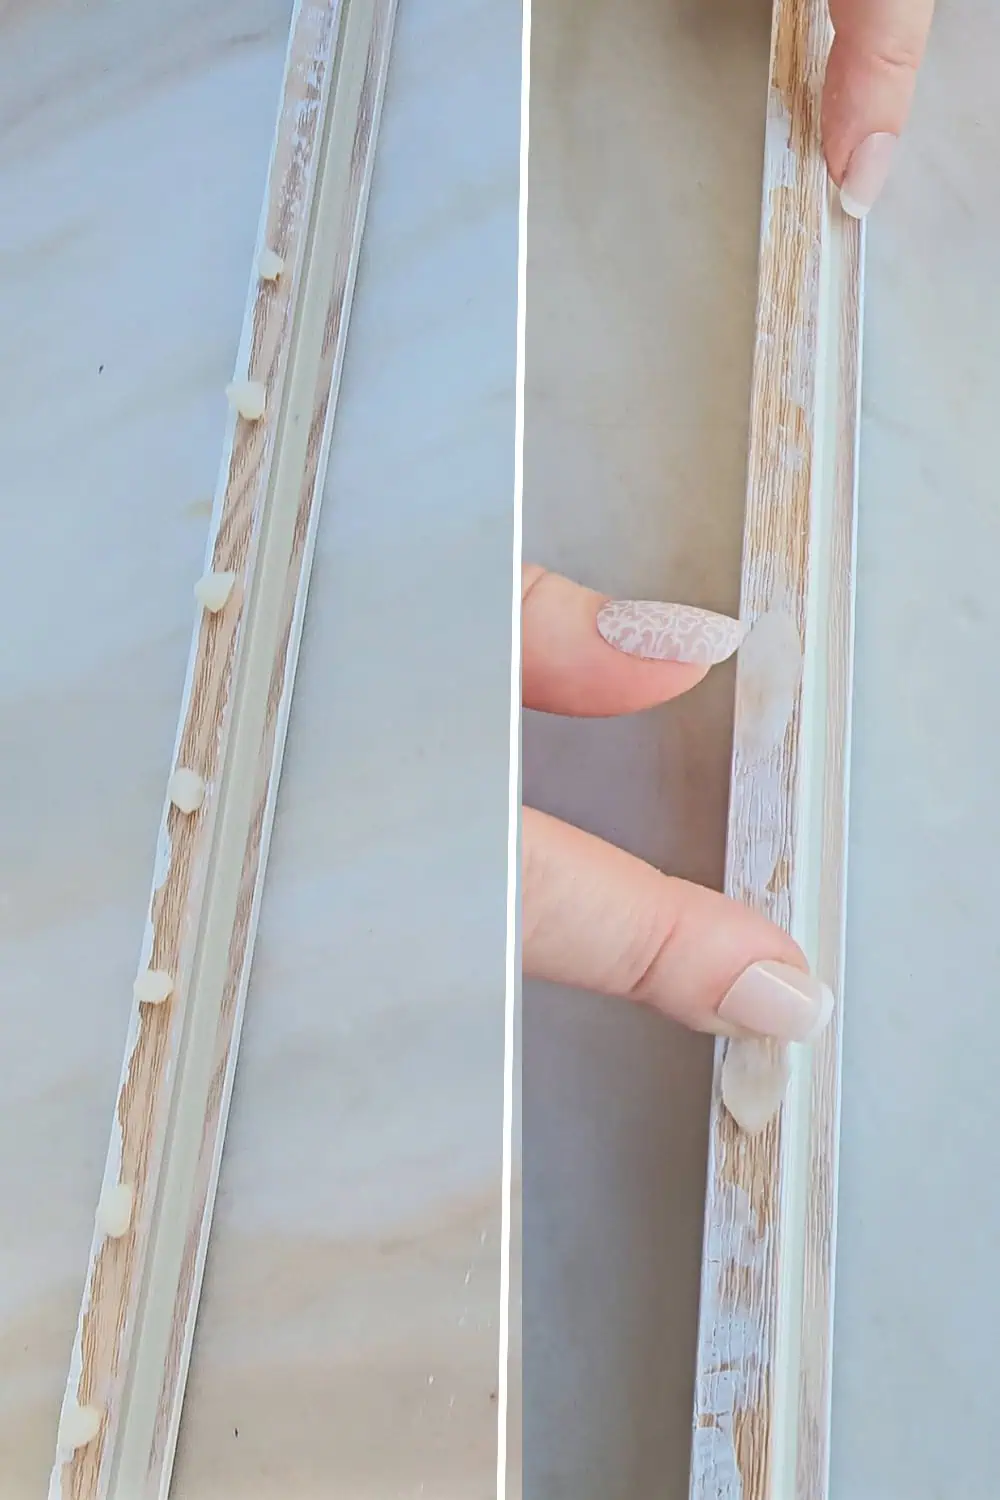
Step 4: Turn the frame over and on the BACK of the frame, spread the putty till it’s a bit flat. Do this every 1 to 2 inches all along the back of the frame.
Step 5: Place the frame on the wall under the lines you made in Step 2, once you’re sure of positioning, use some light pressure to press and hold the frame in place for about 20 seconds.
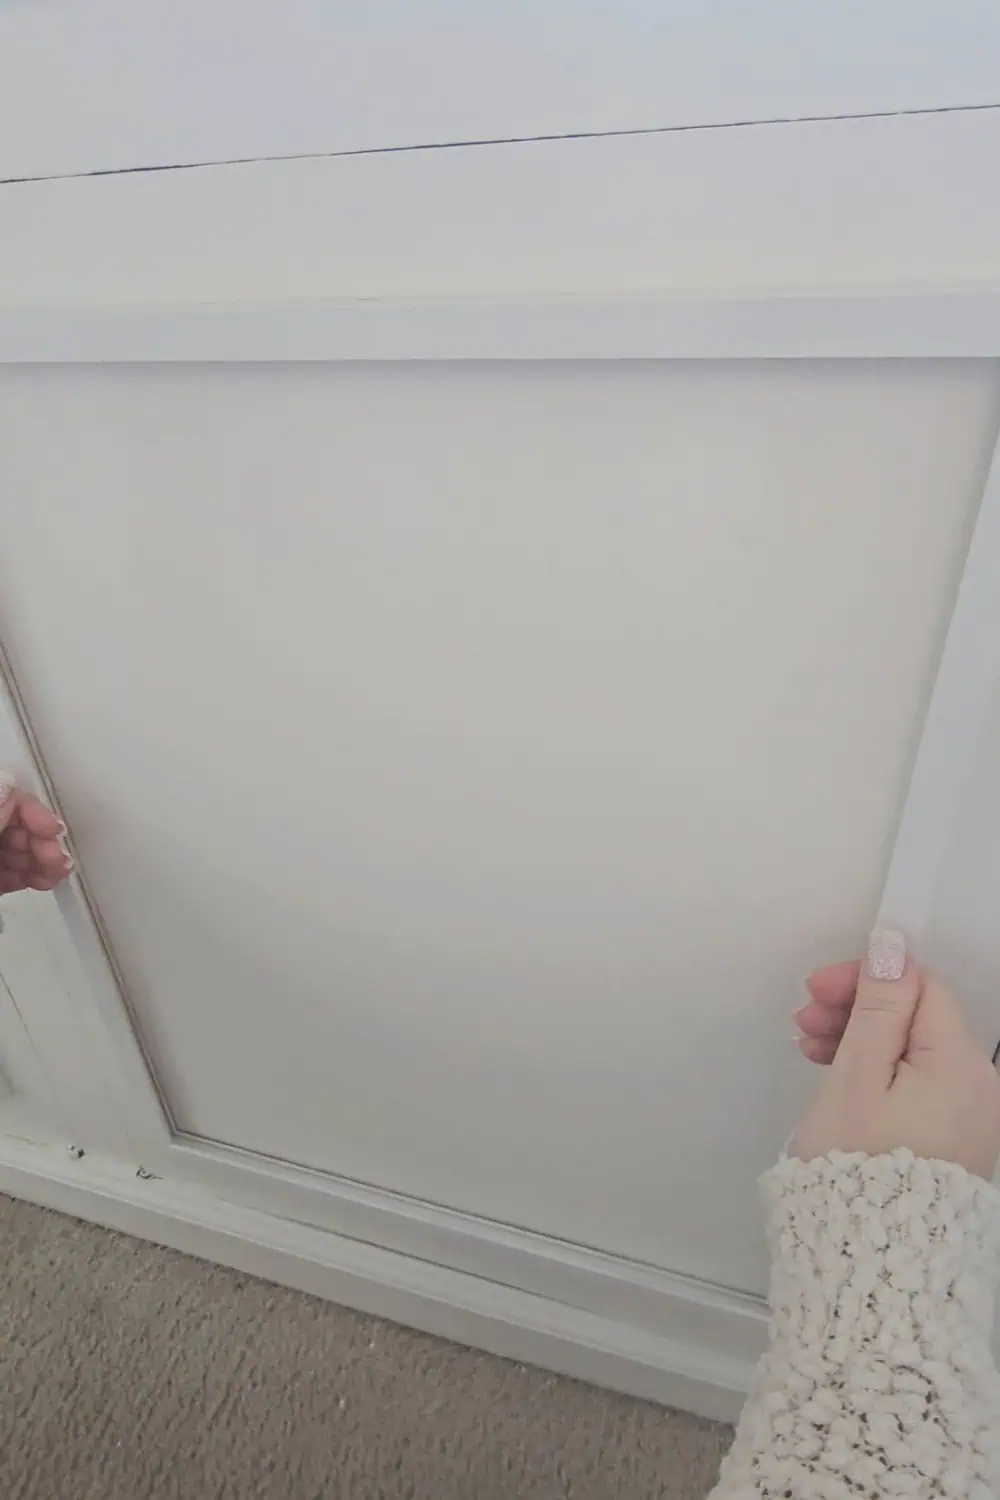
Step 6: Repeat steps 2-5 until all the frames are in position and let set for 24 hours. Note that the picture frames MAY slide down maybe a centimeter or less before they set. This is normal. Once they set they stay in place unless you really knock them hard or try to pull them off.
Step 7: After 24 hours, if any Earthquake putty oozes out of the sides gently wipe it off and add caulk around the seams if desired.
HOW TO REMOVE:
- Gently pull the picture frame off the wall, you can wiggle it first to gently loosen it if it feels stuck.
- Wipe off as much of the excess putty with your fingers.
- Then dampen a paper towel with rubbing alcohol and gently wipe onto the wall to soften the putty then go over it with a Mr. Clean magic eraser sponge (Dollar Tree).
There might be a slight tackiness to the wall after but it won’t show and after time it will set and feel normal. Make sure to ONLY use a paper towel with the rubbing alcohol, we made the mistake of using a cotton pad at first and it took the paint off.
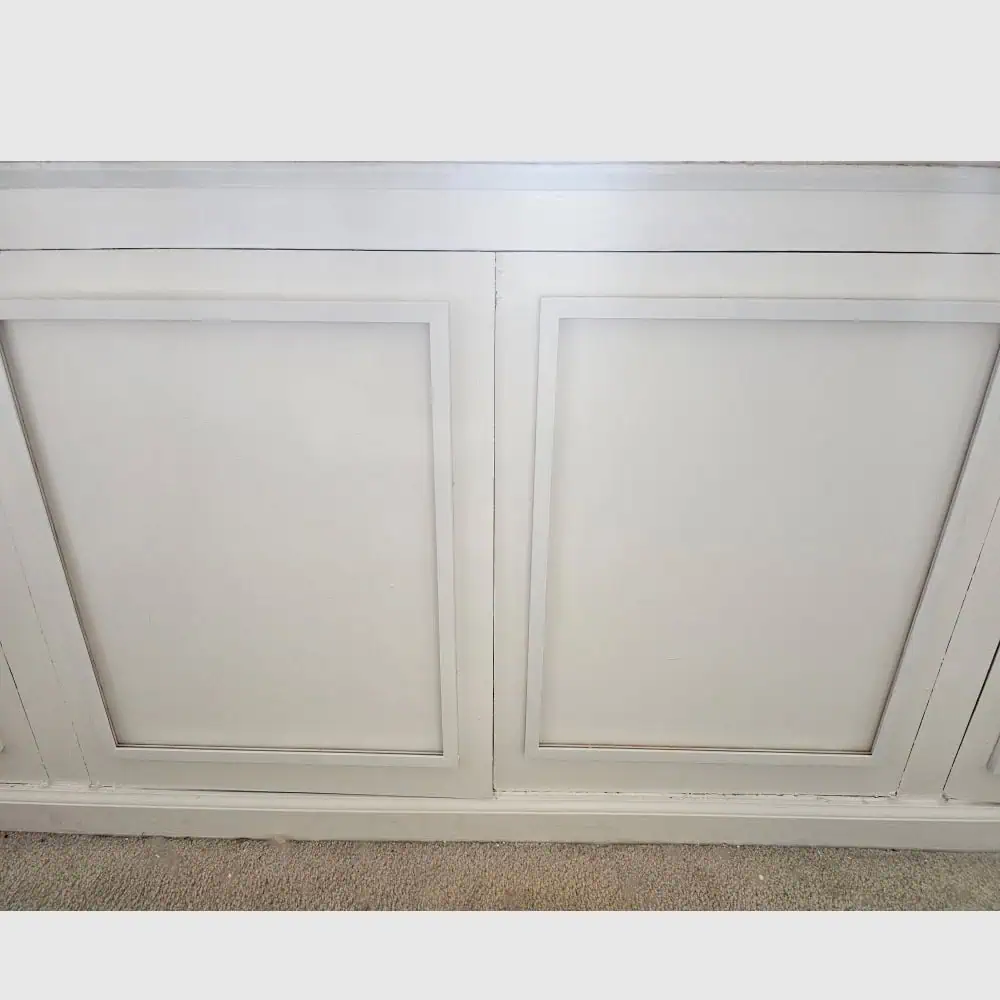
It’s been 4 months since we wainscoted the dining room cabinets in our L.A. condo and they still look beautiful and add such elegance to the room. We’re already planning on doing more cabinets in the hallway and bedroom. What do you think?!
If this easy renter friendly diy wainscoting tutorial inspires your own unique creations, please share your project and tag or link us. We appreciate the love and can’t wait to see your unique spin!
Stay tuned for more amazing make overs and Diys in our L.A. condo redo!
LOVE,