Easy Diy End of Summer Fall Crafts That Aren’t Junk
Let’s be honest, most summer craft lists are full of stuff that is completely useless and ends up looking like junk. You spend your afternoon hot-gluing popsicle sticks only to wonder why you bothered.
This isn’t that list.
These summer crafts are easy, aesthetic, and most importantly they actually turn out good! Whether you’re bored at home, looking for a creative escape, or just want to make something that doesn’t scream “kindergarten project,” this is the ultimate no regret DIY list.
From a Dollar Tree nail polish rack I still use every day, to beachy home decor that actually looks store-bought, these are the summer crafts that aren’t junk because who has time for that?
Painted Flower Wine Glasses Diy Summer Craft Idea
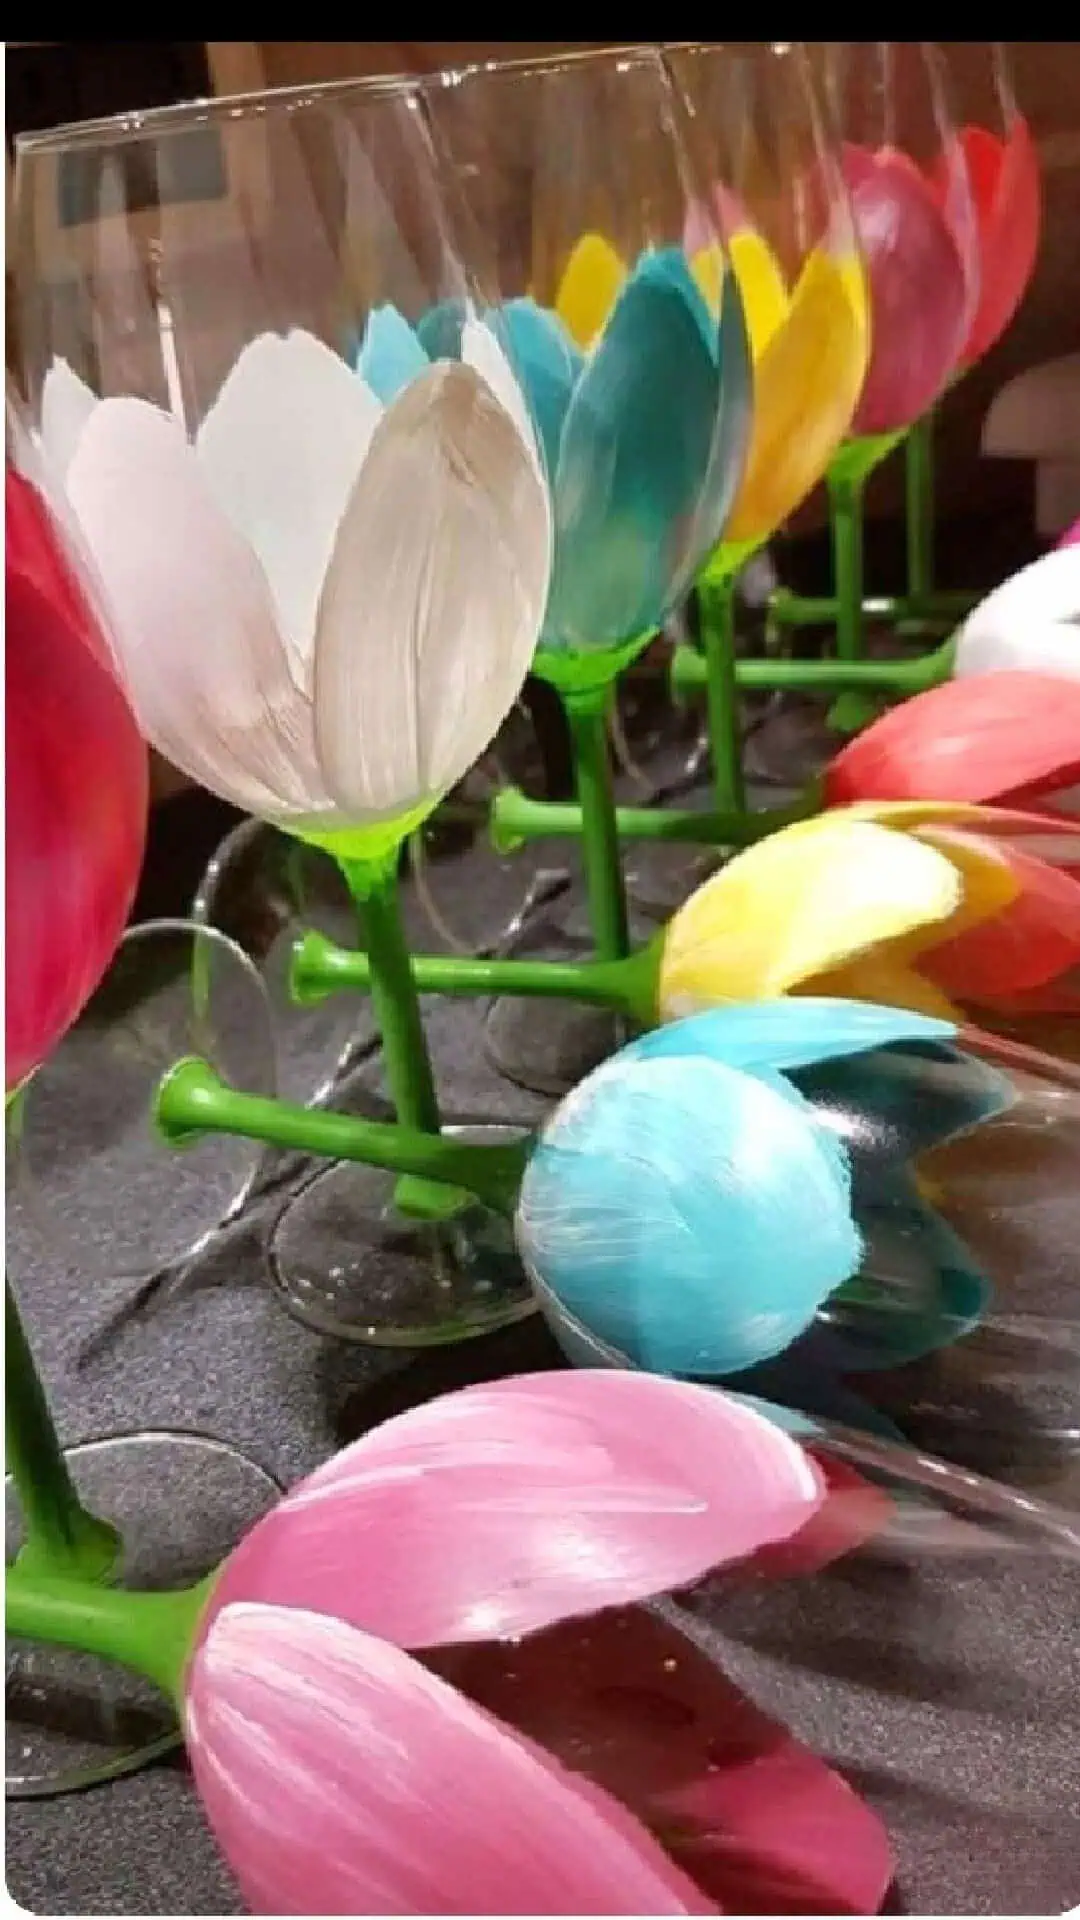
These viral painted wine glasses look like blooming tulips and make stunning handmade gifts, party decor, or table settings. No artistic skill required just the right brush and a few strokes!
Supplies
- Clear wine glasses (Dollar Tree or any discount store)
- Acrylic paint in petal colors (pink, white, blue, yellow, etc.)
- Green acrylic paint for stems
- Medium flat paintbrush
- Small round brush (optional for detailing)
- Sealer (dishwasher-safe Mod Podge or clear acrylic spray)
Directions:
1. Flip the wine glass upside down so the base is at the top (this will be the flower’s base).
2. Using the flat brush, paint petal shapes from the base of the bowl upward. Use curved, vertical strokes — overlap slightly for a layered petal effect.
3. Repeat 2–3 times for opacity, letting each coat dry in between.
4. Paint the stem and base of the glass green to mimic the flower stem.
5. Let dry fully. Then apply a sealer to protect the paint (especially if used for drinking).
6. Allow sealer to cure as directed — usually 28 days for dishwasher-safe Mod Podge.
These look gorgeous as gifts, centerpieces, or party favors and they cost just a few dollars each to make
Decorated Hair Brushes
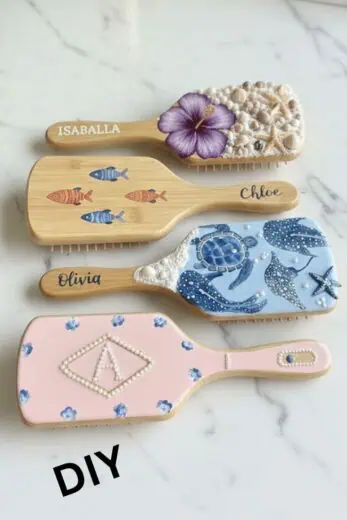
Personalize hair brushes with summer staples like seashells, star fish, and sand. Add your name or make them as gifts!
Beach Photo Memory Jar Craft
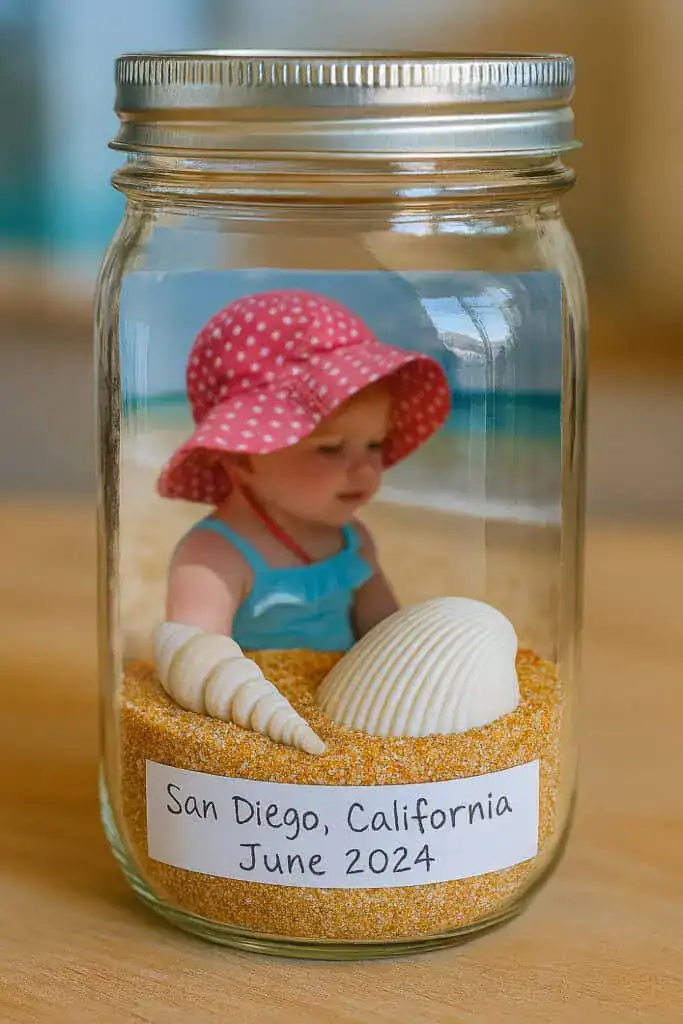
Looking for a meaningful summer craft that doesn’t end up in the trash? This Beach Memory Photo Jar is not only beautiful, it actually preserves a special moment from your vacation. All you need is a mason jar, some sand, seashells, and your favorite beach photo. It’s the perfect mix of sentimental, simple, and display-worthy.
Whether you use beach sand from your trip or Dollar Tree craft sand, this project takes minutes — and looks like something you’d buy at a boutique gift shop. Add a date label, and it becomes a keepsake you’ll cherish forever.
Supplies:
- A mason jar (Dollar Tree or any jar with a lid)
- Sand (from your trip or craft store)
- Seashells
- A printed photo from your beach day (small enough to fit in jar)
- Paper label or tag for date/location
Tips:
- Use cardstock or laminate your photo to help it stand upright
- Try this with vacation photos, wedding beach shots, or even pets
- Add ribbon around the lid for a gift-ready look
This is one of those crafts that actually means something and makes people say, “Wait, you made that?!” Total summer win.
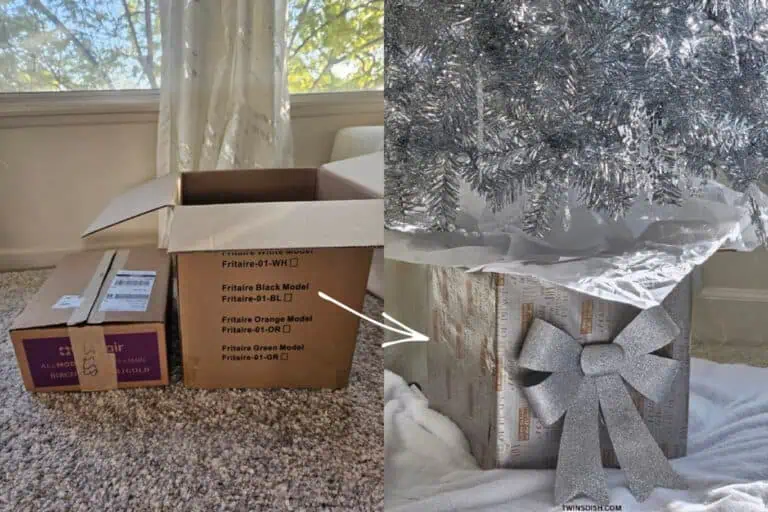
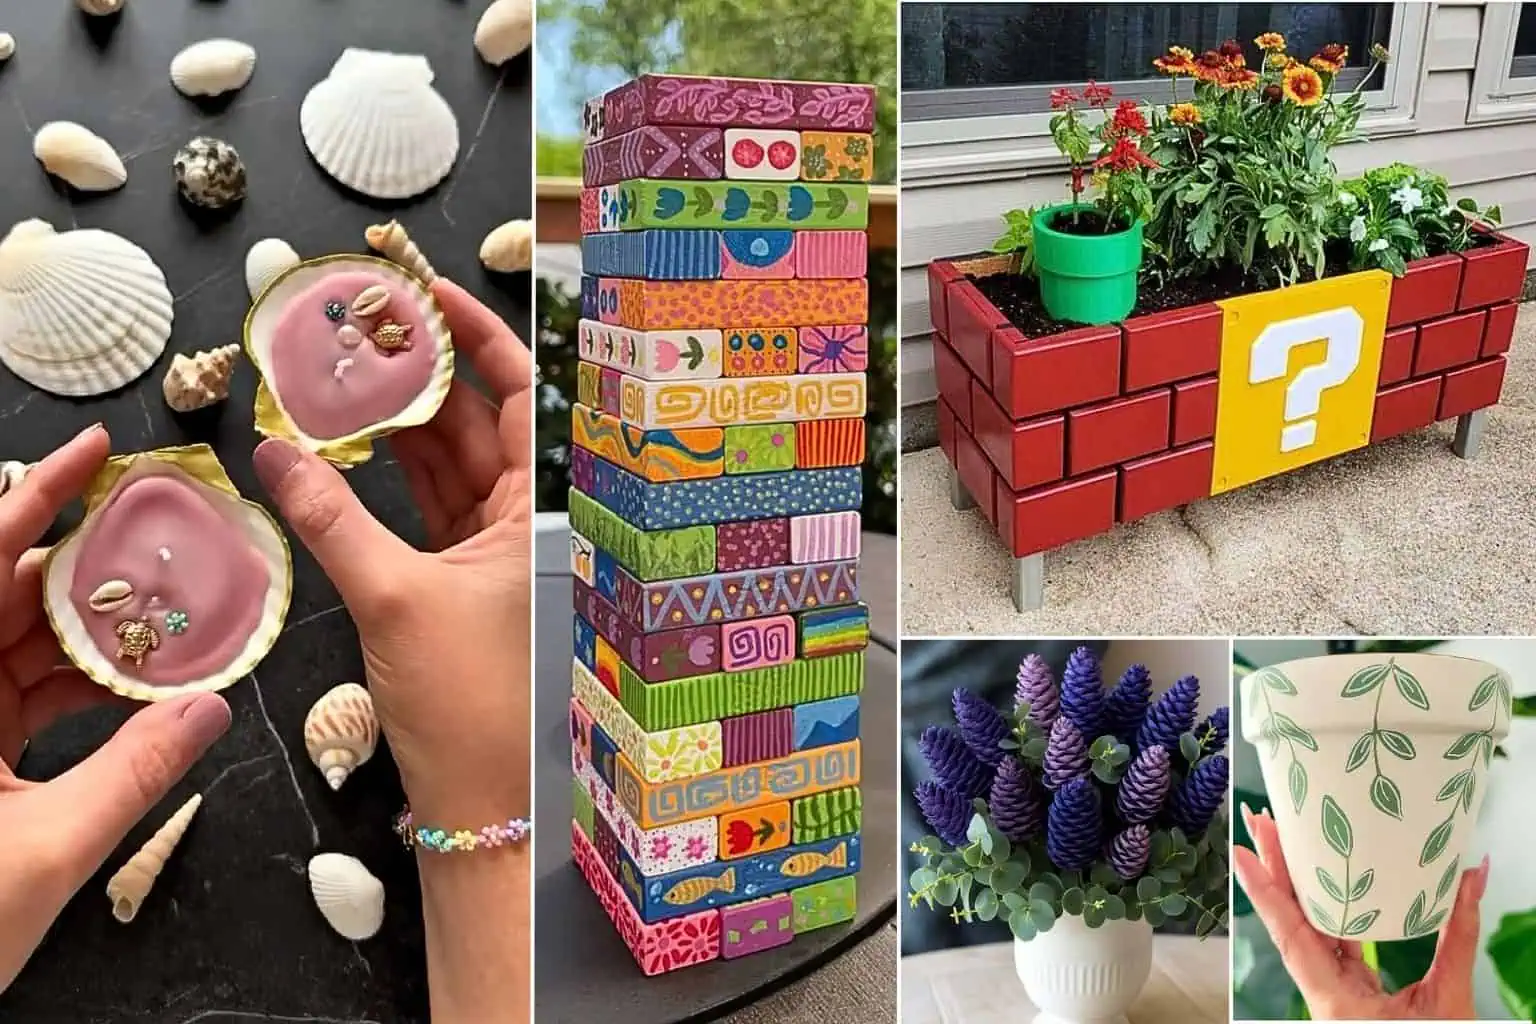
DIY Super Mario Planter Box Summer Craft
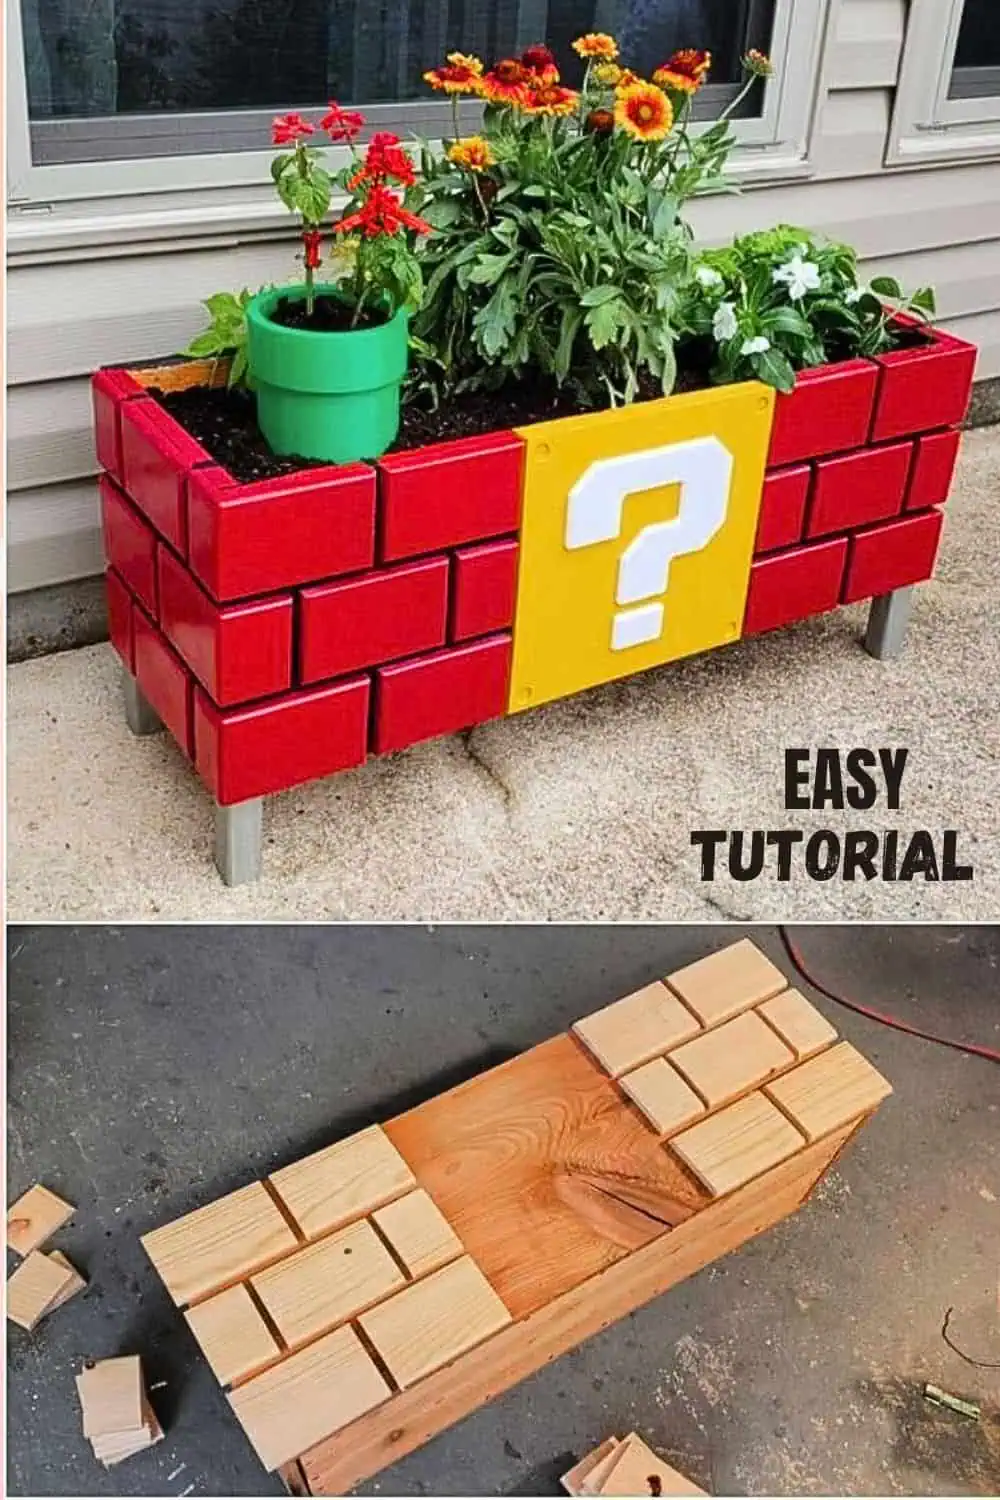
This isn’t just a craft it’s a show stopping, conversation starting piece of decor. Whether you’re into video games, quirky outdoor style, or just want to do something impressive with scrap wood, this planter is a summer project that won’t end up in the trash and both kids, teens, and adults will love.
What You’ll Need:
- Scrap wood or 1×4 and 1×6 pine boards for planter box, or a basic wood planter box
- Wood glue and screws or a nail gun
- Red and yellow spray paint (outdoor-rated)
- Black paint or Sharpie for brick outlines
- White paint or vinyl for the question mark
- Planter liner or black trash bags
- Flowers or herbs
Optional: plastic green pot for “warp pipe”
How to Make It:
Step 1: Build the Base – Cut and assemble a rectangular box using sturdy boards. This will hold your soil and plants.
Step 2: Cut “Brick” Pieces – Cut smaller wood blocks (about 3×5 inches) to mimic bricks. Sand the edges for a smooth finish.
Step 3: Attach the Bricks – Glue or screw the bricks to the front and sides of the base in staggered rows. Leave a space in the center for the yellow question mark panel.
Step 4: Paint – Spray paint the entire planter red. Once dry, use black paint to draw outlines between bricks. Paint a yellow square for the “?” block and add the white symbol.
Step 5: Seal & Line – Spray with a waterproof sealant. Line the inside with plastic or a liner before filling with soil.
Step 6: Plant & Display – Add flowers or veggies, and tuck a small green pot in one corner to look like a Mario warp pipe.
You can also make a Dollar Store version using wood planks, scrap rectangles, or even foam board.
This planter is sturdy, weatherproof, and doubles as yard decor. It’s not only functional it’s display-worthy and totally on trend with nostalgic pop culture.
Lilac Flower Pinecone Bouquet (No One Will Know They’re Not Real)
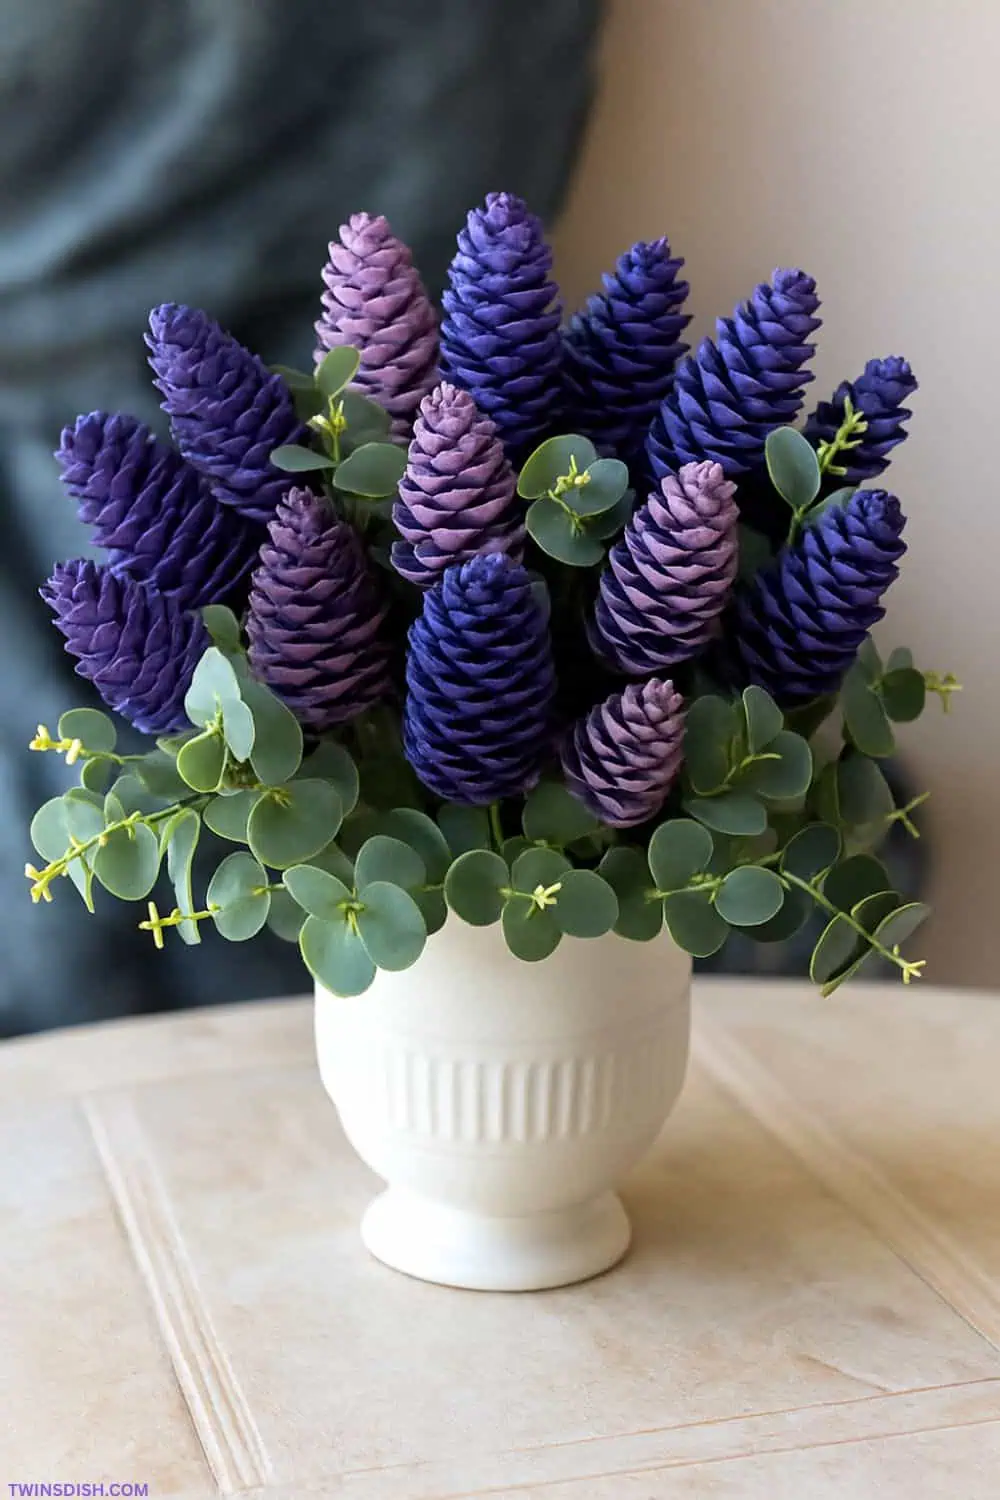
Transform ordinary pinecones into a stunning lilac bouquet that lasts year-round! Simply dilute acrylic paint with water and dip each pinecone to coat it in beautiful purple tones. Hang them upside down to dry as they dry, the petals open up, mimicking real lilacs.
To create stems, attach wooden sticks (Walmart or Dollar Tree dowels work great) into small holes drilled at the base of each pinecone using hot glue.
Add faux leaves or greenery to complete the look, or tuck the pinecones directly into an existing artificial plant for a full, lifelike display.
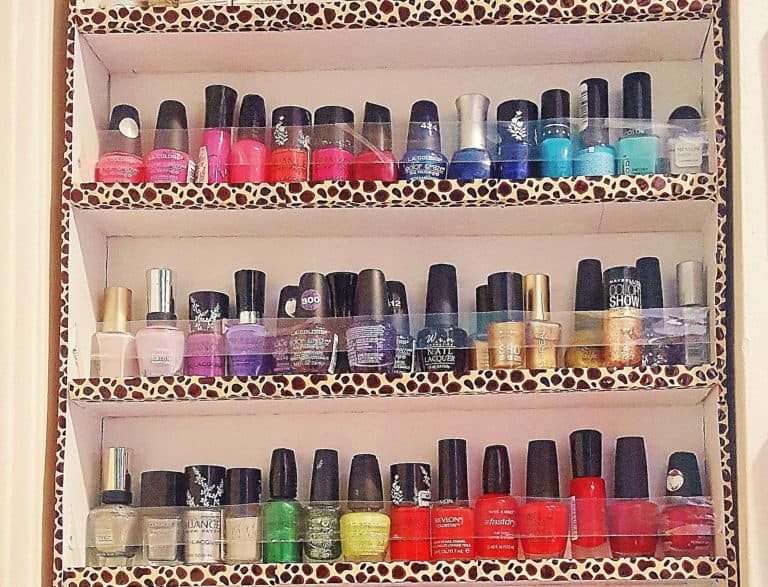
100 Bottle Diy Nail Polish Rack Made With Dollar Tree Foam Boards
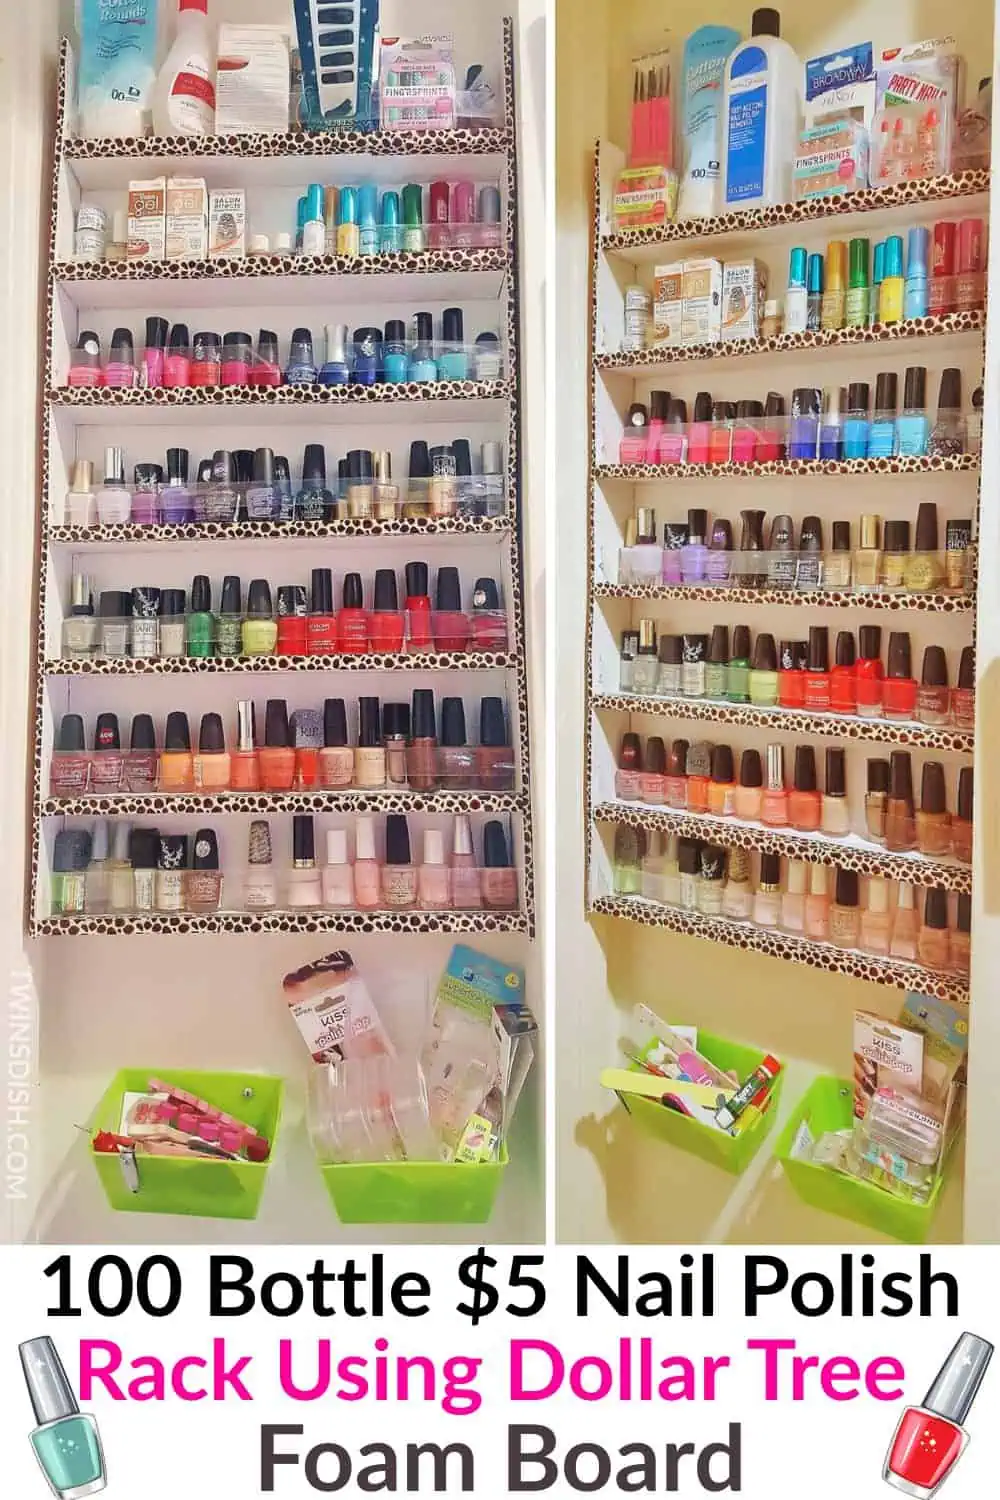
This $5 Diy nail polish rack is LIFE CHANGING and perfect for a small space. You don’t need power tools or wood, just Dollar Tree foam boards, glue, masking tape, and some nails (optional). I built mine in 1 afternoon and customized it to fit a nook in my doorway. It completely changed my beauty routine in the best way! Nail polish lovers NEED this!
CLICK HERE FOR DOLLAR TREE NAIL POLISH RACK TUTORIAL
Paper Napkin Seashell Jewelry Dish Summer Craft
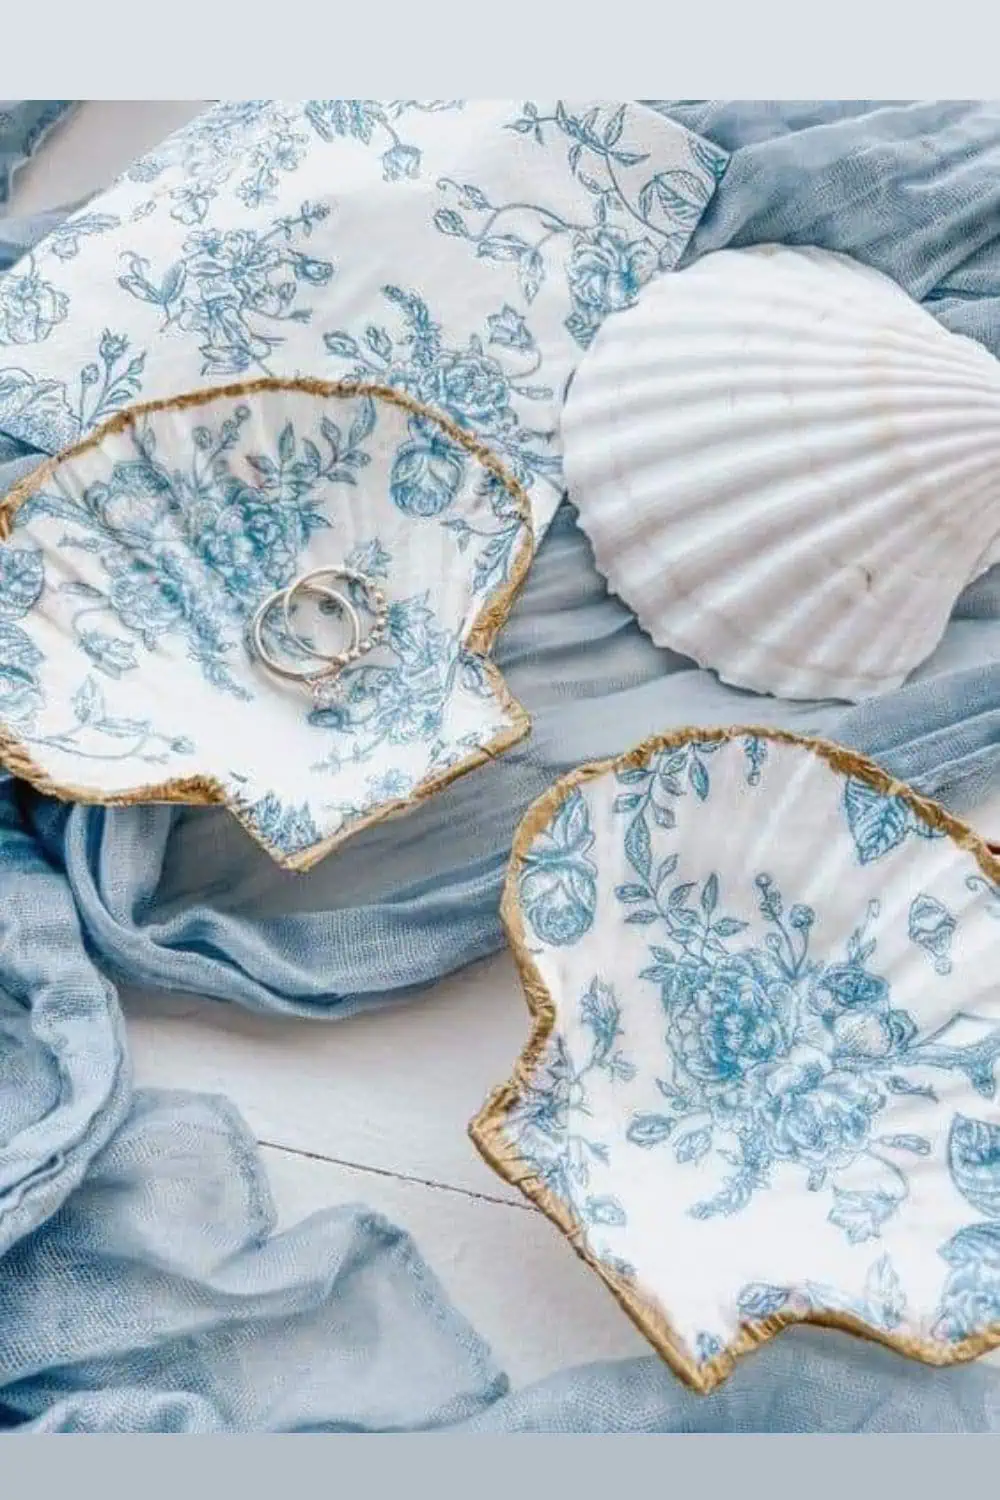
This is one of the easiest and prettiest summer crafts you can make using beach shells or Dollar Store supplies. It’s perfect for rings, earrings, gifts, or coastal decor and it looks way more expensive than it is.
What You’ll Need:
- Clean dry scallop seashells (from the beach, Dollar Tree, or Amazon)
- White acrylic paint
- Mod Podge
- Metallic gold leafing paint
- Vintage or floral napkins (like these coastal ones here)
- Quick Video Tutorial
DIY Seashell Tealight Candles – Easy Summer Craft
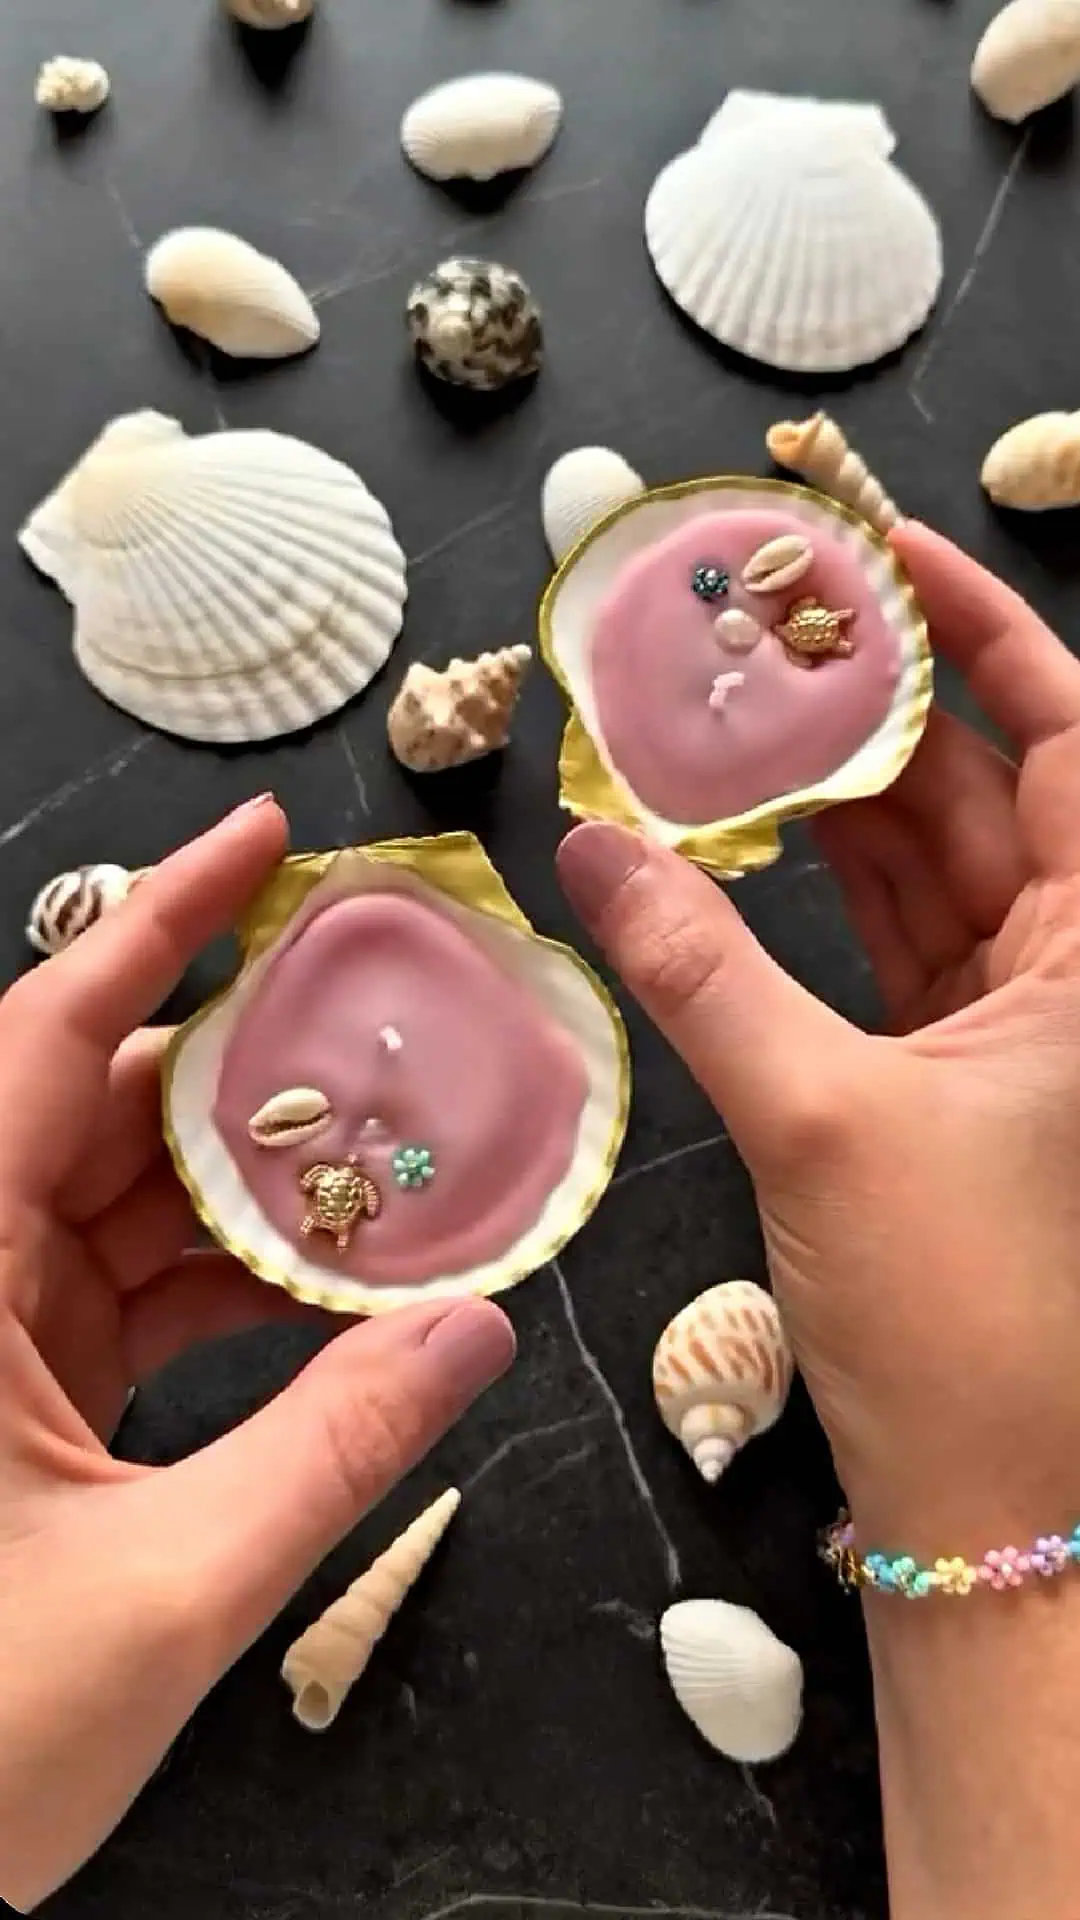
These DIY seashell candles look like something you’d find in a coastal gift shop but they’re incredibly easy to make at home using just Dollar Store materials and a tea light! They’re the perfect craft for summer: aesthetic, affordable, and functional.
Whether you display them on your vanity, give them as handmade gifts, or use them as party favors, these seashell candles are a not-junk DIY that actually feels upscale.
Supplies You’ll Need:
- Real or faux scallop shells
- Tea light candles (any color)
- A lighter or heat tool
- Small decorative charms, beads, or mini shells
- Gold paint pen or metallic paint (optional for rim)
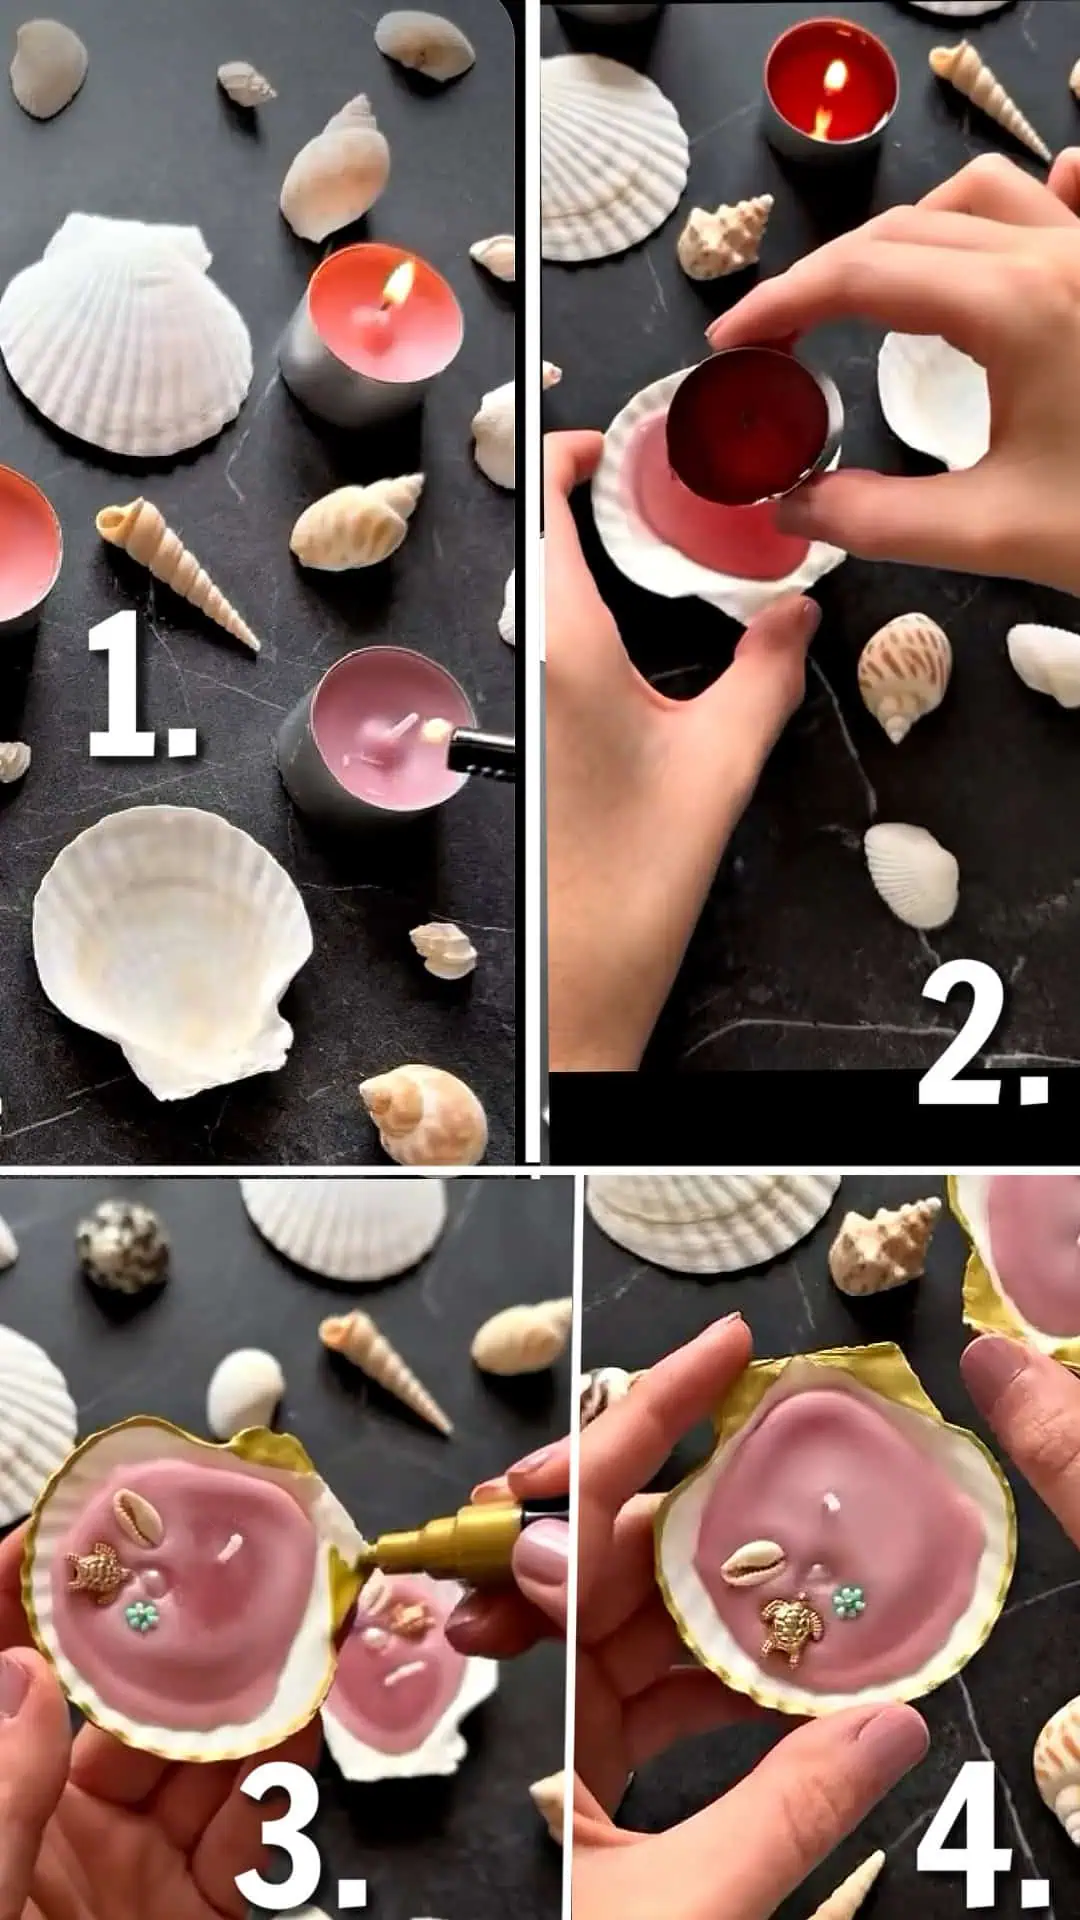
How To Make Them
- Light a tea light candle and let the wax melt down.
- Remove the wick of the tea light candle and set aside.
- Pour the melted wax directly into the center of the empty shell.
- Immediately place wick in center of shell and hold in place until wax starts to cool.
- While the wax is still warm, press small charms or embellishments into the surface.
- Add a gold-painted rim for a boutique-style finish.
- Let cool completely and trim the wick if needed.
The step-by-step process is shown in the image tutorial above, and you can also follow along in this quick DIY video:
👉 Watch the Seashell Candle Tutorial Here
Pro Tips:
Use different color waxes to match seasons or party themes.
Add a few drops of essential oil before the wax sets for fragrance.
Make multiples and bundle as gifts in a sheer bag with a bow.
This project is as pretty as it is practical and proves that easy crafts don’t have to look cheap. Save your shells, light your creativity, and start crafting!
Painted Jenga Block DIY – Easy Summer Craft Game
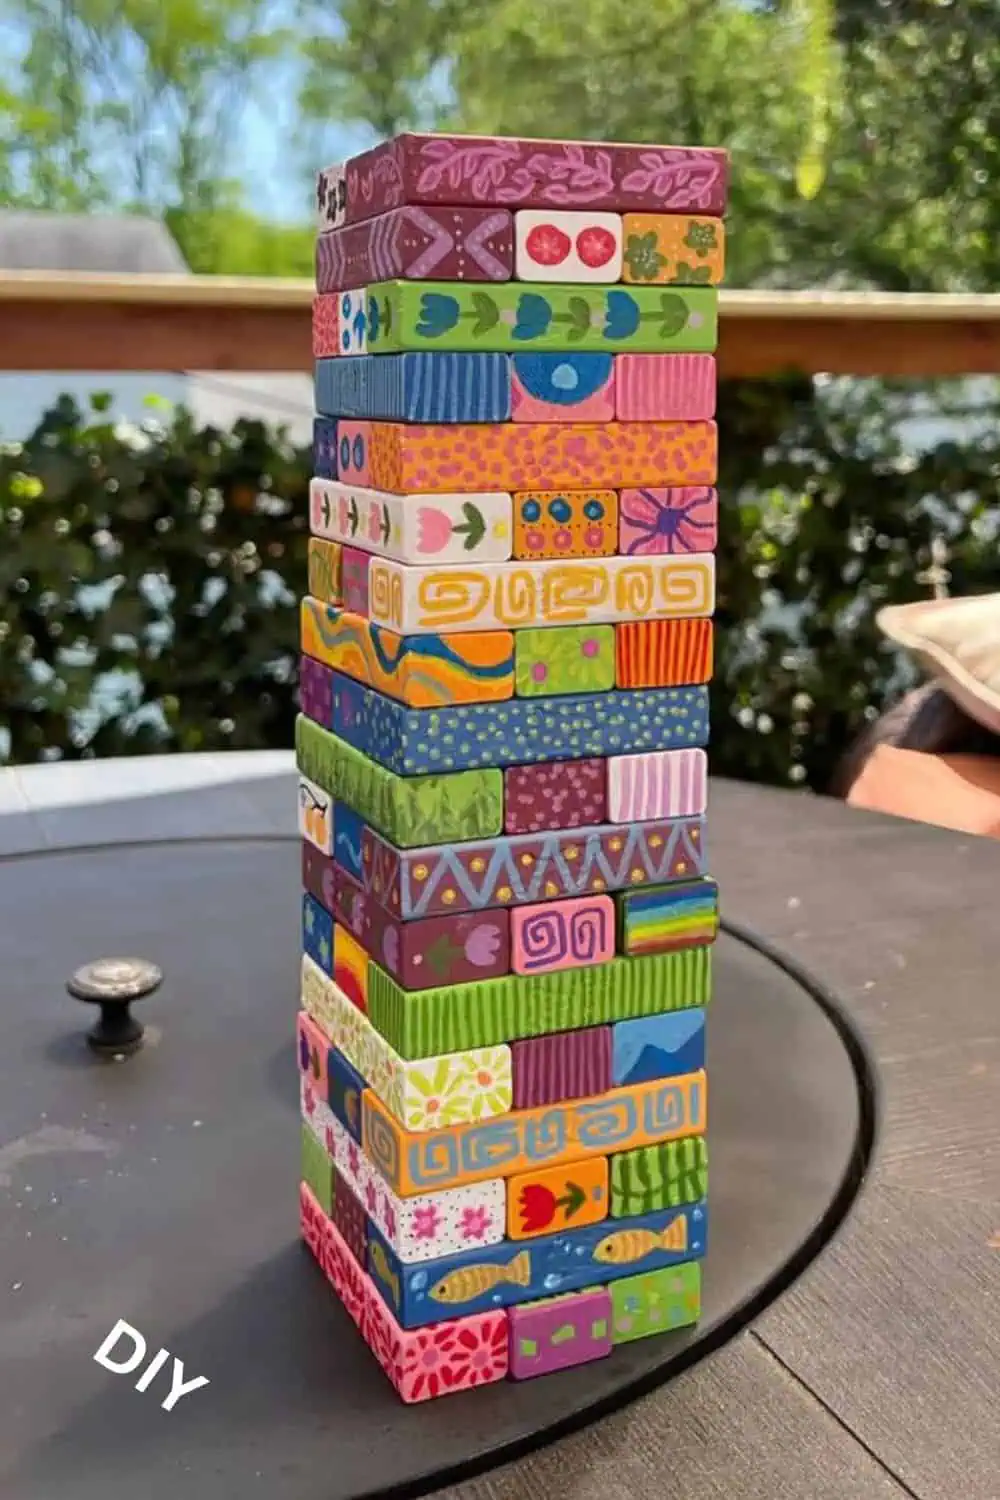
This is one of those rare summer crafts that’s not only fun to make it keeps being fun after you’re done. With just a few paints and an old (or Dollar Tree) tumbling tower set, you can create a colorful, personalized Jenga-style game that looks amazing and makes every round more exciting.
Whether you go for a rainbow palette, floral motifs, or patterns that match your decor, painted Jenga blocks are a hands-on craft with endless possibilities. Best part? It works for all ages kids, teens, adults, even bachelorette parties or backyard BBQs.
What You’ll Need:
- A wooden tumbling tower set (from Dollar Tree or any Jenga-style game)
- Acrylic paints in various colors
- Fine-tipped brushes or paint pens
- Paint sealer (Mod Podge or clear spray)
How to Make It:
- Separate the blocks and lay them out flat on a table or tray.
- Paint one side at a time, adding designs like flowers, symbols, doodles, or color-block patterns.
- Let each layer dry before flipping.
- Seal with a clear finish to prevent chipping during gameplay.
- Stack it back up and play!
Optional Twist:
Write fun prompts or dares on the ends of each block — like “sing a song,” “do 10 jumping jacks,” or “tell a joke.” It turns into a hilarious party game.
This is one of the most actually usable summer crafts you’ll find. It’s cheap, relaxing, looks amazing, and gives you a custom game set that guests will talk about. Zero junk. All fun.
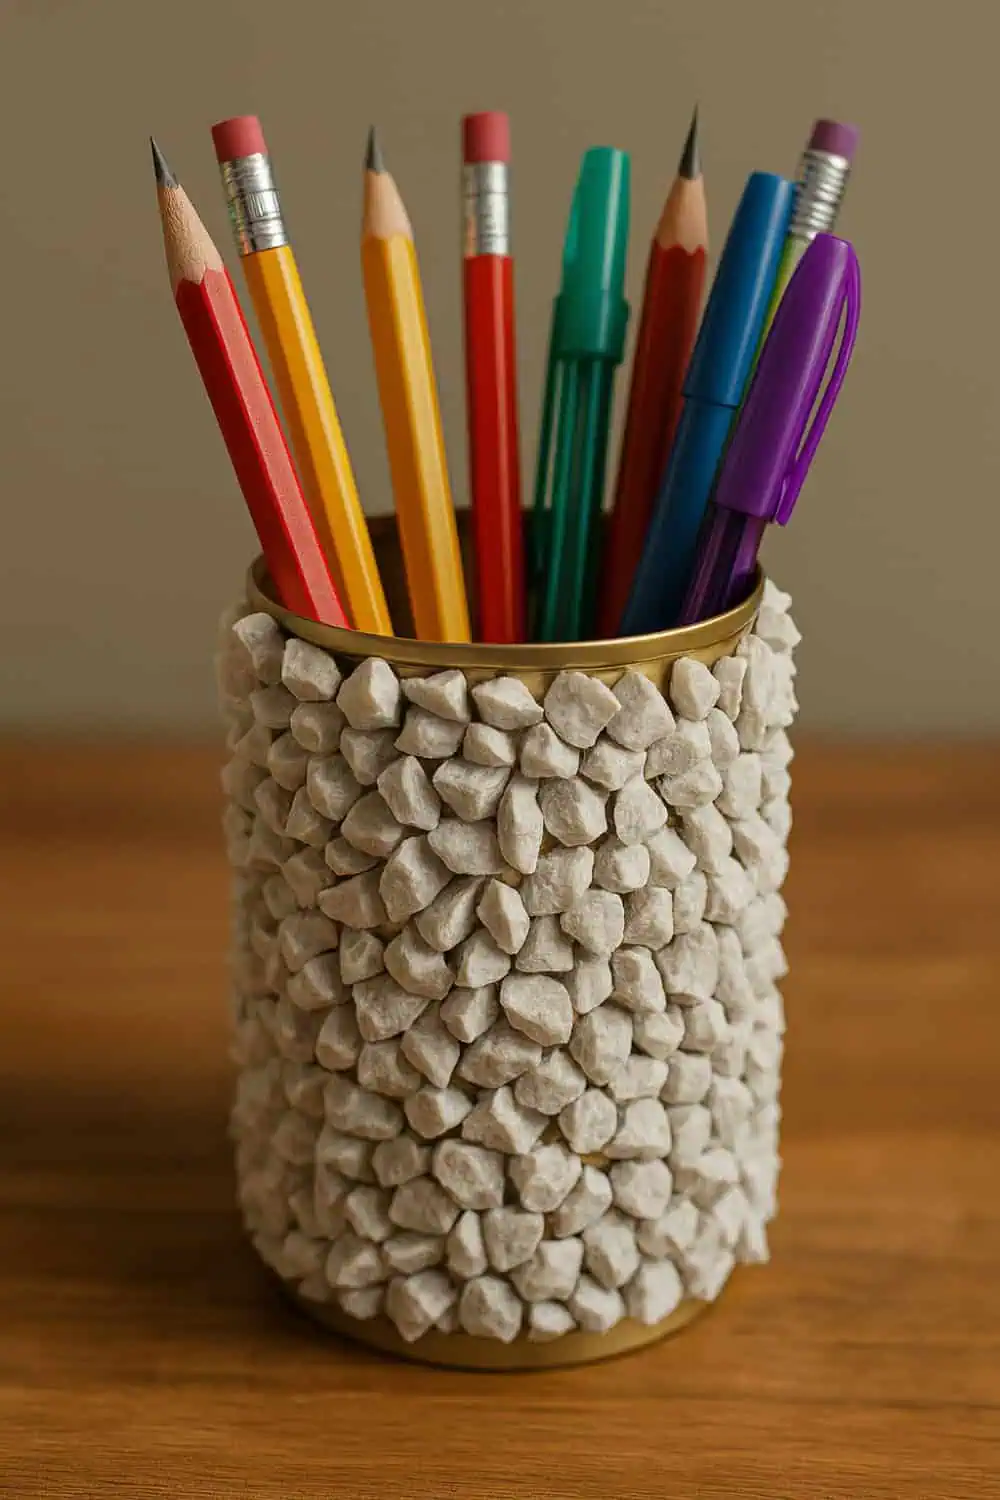
Decorated Tin Can Pencil Holder Crafts
How to Make a DIY Stone-Covered Pencil Holder
What You’ll Need:
- 1 clean, empty tin can
- Small decorative stones (from Dollar Tree, craft store, or garden center)
- Hot glue gun + glue sticks
- Optional: spray paint (for base color)
- Pencils, pens, or supplies to fill it
Instructions:
- Clean & dry your tin can – Remove the label and glue residue so you have a smooth surface.
- (Optional) Spray paint the can – If you want a colored base to peek through the stones, paint it first and let dry.
- Glue the stones on – Working in small sections, apply hot glue to the can and press stones in place one at a time. Start from the bottom and work your way up.
- Cover the entire outside surface – Leave the inside and rim clean, or add a metallic trim for a polished look.
- Let it dry completely – Once the glue is set, your pencil holder is ready to use!
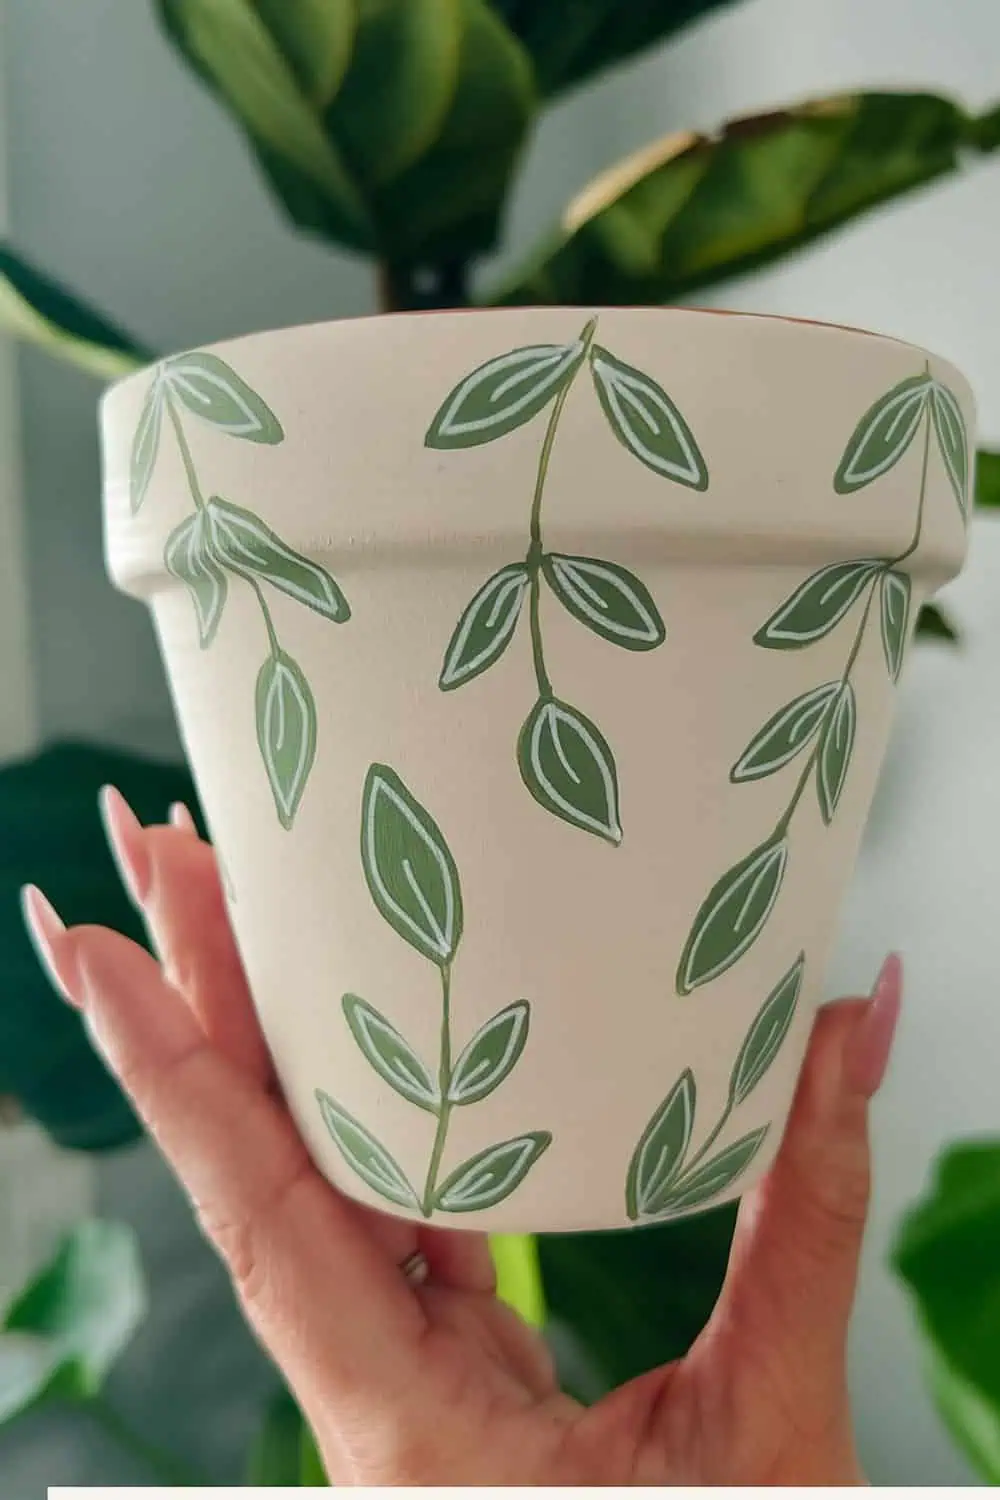
Diy Painted Pot Crafts
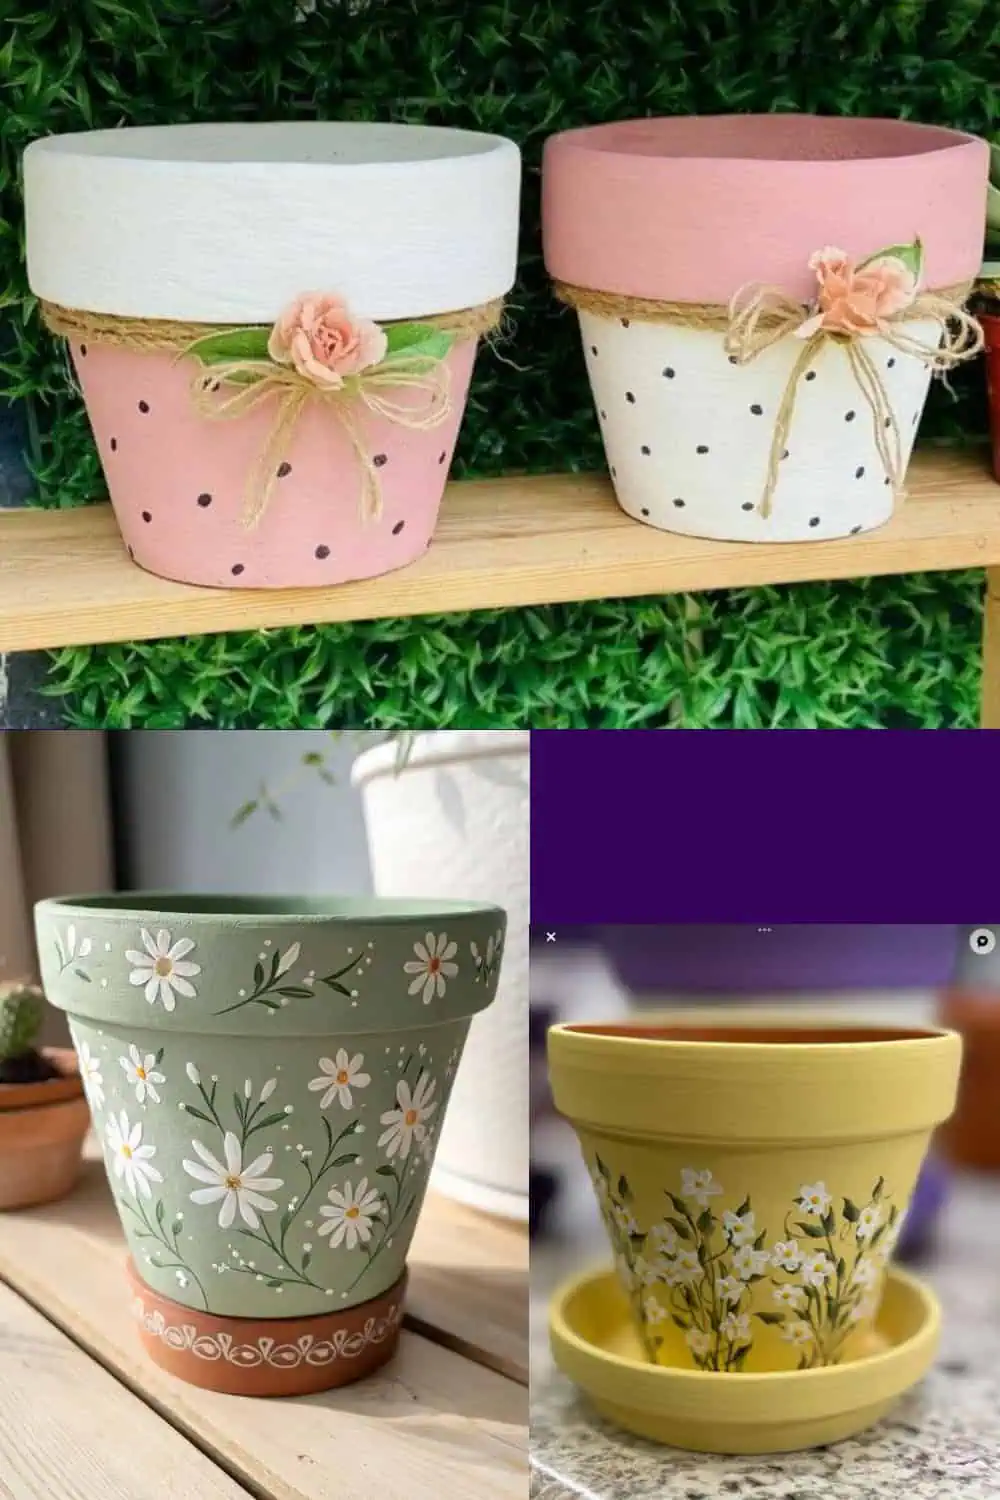
Boho Painted Flower Pot With Ghosts and Flowers End of Summer Craft
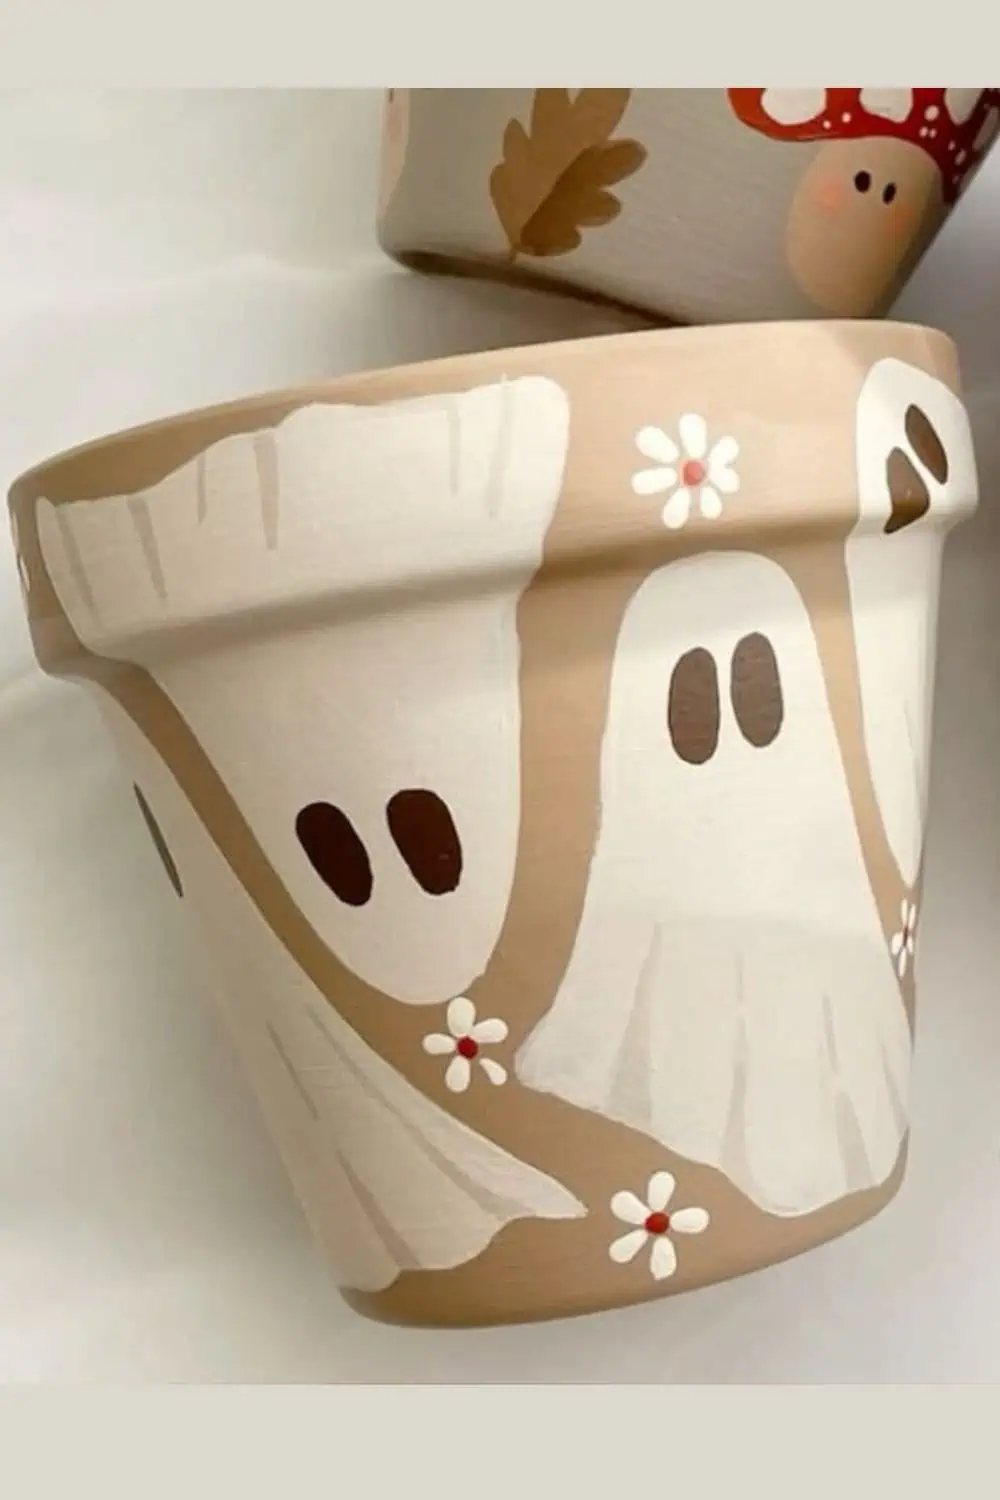
This adorable boho painted pot is a spooky summer craft you can make for fall boo baskets or Halloween decor!
Halloween Painted Flower Pots End of Summer Craft

Pull out your paint pens, sharpies, and stencils, for flower pots dedicated to your favorite horror movie villians!
Easy DIY Dollar Store Halloween Doormat Craft
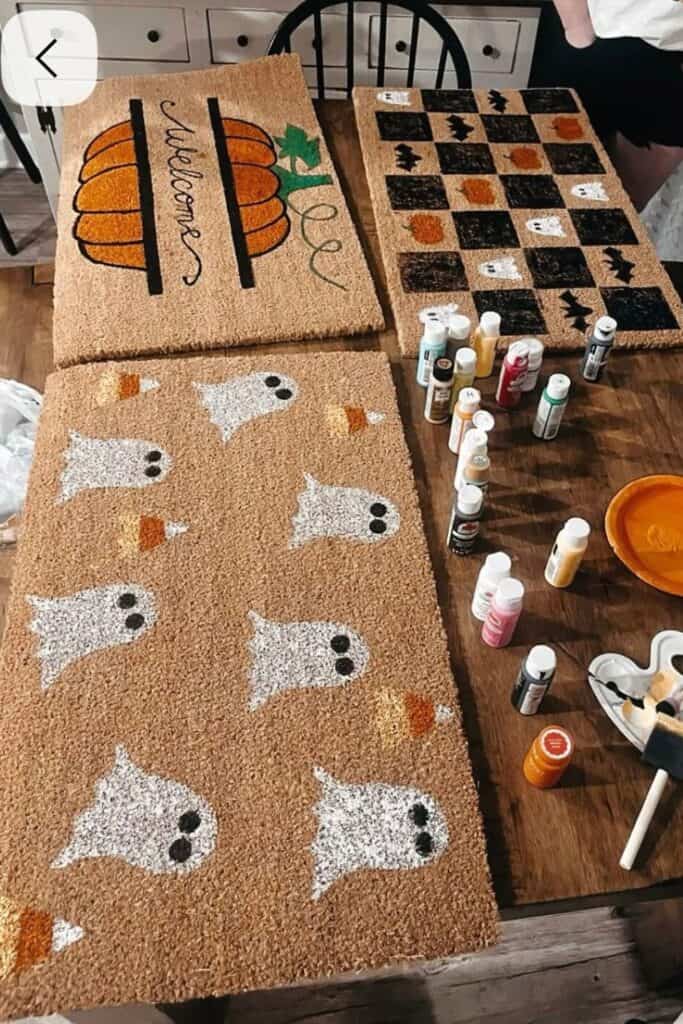
Looking for a budget-friendly way to decorate your porch this spooky season? These DIY Halloween doormats are the perfect end-of-summer craft to transition into fall. Made with plain coir mats, cheap paint, and a few stencils, you can create fun designs like pumpkins, candy corn ghosts, and bats that look store-bought but cost a fraction of the price. This project is simple, affordable, and a great family activity for a cozy fall afternoon.
Quick DIY Tutorial
-
Grab your supplies – plain coir doormat, dollar store paint, foam brushes, and Halloween stencils.
-
Position your stencil and tape it down to keep it from shifting.
-
Dab on the paint (don’t brush) so it sinks into the mat fibers. Apply 2–3 coats for bold colors.
-
Let it dry completely for 24 hours.
-
Optional: Spray with a clear outdoor sealer to help your design last longer.
That’s it! In under an hour, you’ll have a custom Halloween welcome mat to wow your guests and trick-or-treaters. 🎃
Whether you’re crafting solo, with your kids, or for your sanity, these DIYs prove that creativity doesn’t have to be clutter. Each of these projects is beautiful, practical, and worth your time no hot glue regret, no landfill guilt. Just crafts that actually get used, gifted, or admired. So pick your favorite, grab your supplies, and make something that doesn’t just fill an afternoon it adds joy to your summer.
LOVE,